Smartidiot53191@legacy41572483 (talk | contribs) (→Loot) |
mNo edit summary |
||
| Line 1: | Line 1: | ||
| + | {{npcbox |
||
| − | Druids guide to Molten Core |
||
| + | |name=Deeb |
||
| + | |image=Deeb.jpg |
||
| + | |level=12 |
||
| + | |type=Rare |
||
| + | |race=Murloc |
||
| + | |mana=374 |
||
| + | |health=230 |
||
| + | |location=[[North Coast]], [[Tirisfal Glades]] |
||
| + | }} |
||
| + | '''Deeb''' is a level 12 [[rare mob]] [[murloc]] found standing idle on the [[North Coast]] in the [[Tirisfal Glades]]. It is on a 1.5-2.5 hour respawn timer. |
||
| − | This document is intended to serve as a guide specific to [[druid]]s in [[Molten Core]]. There are several general guides already around (which will be linked to many times in this document), but this is meant to serve as a repository for druid hints and tricks to make the trip smoother. |
||
| − | == |
+ | ==Loot== |
| + | *{{item|Cranial Thumper}} |
||
| − | Before delving into this, if you aren't familiar with MC I'd suggest taking a look at some of these general guides first: |
||
| + | ==Trivia== |
||
| − | * [[Molten Core]] - [[WoWwiki]]'s version |
||
| + | Together with another member of the [[Torn Fin]] tribe named [[Muad]], Deeb is a reference to Muad'dib from Frank Herbert's book ''Dune''. |
||
| − | * [[http://conquest.teamgbu.com/strats/moltencore/Map.php Conquests guide to Molten Core]] |
||
| + | ==External links== |
||
| − | Feel free to add useful documents here at any time. |
||
| + | <!-- Read http://www.wowwiki.com/WoWWiki:External_links before posting your links here. |
||
| + | Links that do not conform to the rules will be DELETED. |
||
| + | Repeat violations may result in a BAN. |
||
| + | Have a nice day. :) --> |
||
| + | {{elinks-NPC|1911}} |
||
| + | [[fr:Deeb]] |
||
| − | == Preparation == |
||
| + | [[Category:Murlocs]] |
||
| − | Probably the most important thing a druid can do for Molten Core is come prepared. It's a well known fact that druids are one of the most gear dependent classes in Warcraft - bring everything you need to be able to fill just about any role. You can leave the Catform set in the vault if you like, but it's not uncommon at all for a Druid to have to swap in the tank gear from time to time. At a minimum, I'd suggest bringing your best gear for the following roles: |
||
| + | [[Category:Rare mobs]] |
||
| − | |||
| + | [[Category:Tirisfal Glades mobs]] |
||
| − | * [[Heal]]ing (duh) |
||
| − | * [[Tank]]ing |
||
| − | * [[Fire Resist]] (will elaborate later) |
||
| − | |||
| − | Also remember to bring plenty of [[potion]]s along, you never know when you might need them. Here is a list of [[consumable]]s that a lot of druids pack with them: |
||
| − | |||
| − | * Healing Potions |
||
| − | * [[Mana]] Potions |
||
| − | * [[Heavy Runecloth Bandage]]s (yes, you'll be using these to save mana) |
||
| − | * [[Greater Fire Protection Potion]]s (these are so darn useful, and not just for Ragnaros) |
||
| − | * [[Nightfin Soup]] (Mana regen) |
||
| − | * [[Night Dragons Breath]] (Basically a Mana/Health potion on a separate timer) |
||
| − | * [[Stamina]] [[Food]] (every little bit helps) |
||
| − | |||
| − | Of course there are other consumables you can bring for a bit more of an edge (Shadow protection for Gehennas, Arcane Protection for Shazzarah, Arcane Elixir for Balance druids), but they aren't nearly as useful throughout the entire run as the ones listed above. |
||
| − | |||
| − | Also, don't forget to bring your Reagants (lots of em): |
||
| − | |||
| − | * [[Wild Thornroot]] |
||
| − | * [[Ironwood Seed]] |
||
| − | |||
| − | And last but not least - '''DON'T FORGET TO [[REPAIR]]''' |
||
| − | |||
| − | === Healing Gear === |
||
| − | |||
| − | Before I go any further, I want to say something first - '''Stamina is Key'''! You need a lot of [[Hitpoint]]s to live through even the trash mobs looking your way for a few seconds, and you're no good if you're dead. Do NOT neglect your Stamina in favor of anything else listed here. |
||
| − | |||
| − | Anyways, I'm only putting this section here to keep this document continuous. Most druids know how to gear up for healing, but there are a few things different during a full raid that the uninitiated druid might benefit from knowing about. |
||
| − | |||
| − | First of all - up until full on raid encounters, [[mana regeneration]] doesn't play that big a roll. Fights don't last that long, and a larger manapool is plenty to get you through things. When you start fighting bosses in MC, this changes - [[Spirit]] and Mana Regen become key. I'm not going to make a list here - check [http://www.thottbot.com] or [http://wow.allakhazam.com] for Spirit and Mana Regen items. The [[Wildheart]] gear has very high spirit - for PvP and 5 man instances this kinda sucks, but for a 5+ minute fight it becomes darn nice. |
||
| − | |||
| − | === Tanking Gear === |
||
| − | |||
| − | Being the 2nd best tank in WoW, [[Feral Druid]]s will often be called up for tanking. This is a short list of tanking gear to get you started. |
||
| − | |||
| − | Mostly, we're looking for non-armor pieces that have unusual amounts of [[Armor]] and Stamina. |
||
| − | |||
| − | * [[Ring]]s |
||
| − | ** [[Ring of Protection]] [[http://wow.allakhazam.com/db/item.html?witem=15855]] - One of the best rings for Druid tanking |
||
| − | ** [[Band of the Great Tortoise]] [[http://wow.allakhazam.com/db/item.html?witem=9642]] - Nice green from a quest in [[Tanaris]] |
||
| − | ** [[Thralls Resolve]] ([[Horde]] only) [[http://wow.allakhazam.com/db/item.html?witem=12544]] - Horde only ring. |
||
| − | |||
| − | * [[Trinket]]s (this is a big one, since these really don't sacrafice any stats) |
||
| − | ** [[Mark of Tyranny]] [[http://wow.allakhazam.com/db/item.html?witem=13966]] - This is a must for Feral Druids. You can get other [[DPS]] trinkets but not other Tanking ones. |
||
| − | ** [[Smoking Heart of the Mountain]] [[http://wow.allakhazam.com/db/item.html?witem=11811]] - This is also a great item. You must level enchanting but you can drop it and still use the item. |
||
| − | |||
| − | * [[Weapon]]s |
||
| − | ** [[Warden Staff]] [[http://wow.allakhazam.com/db/item.html?witem=943]] - Great Druid tanking weapon. [[Enchant]] with +25 [[Agility]] and this will be hard to beat. |
||
| − | ** [[Unyielding Maul]] [[http://wow.allakhazam.com/db/item.html?witem=18531]] - Stats similar to Warden Staff. Just slightly less. |
||
| − | |||
| − | * Armor with unusually high [[AF]] |
||
| − | ** [[Slaghide Gauntlets]] [[http://wow.allakhazam.com/db/item.html?witem=13258]] |
||
| − | ** [[Cloudrunner Girdle]] [[http://wow.allakhazam.com/db/item.html?witem=13252]] |
||
| − | ** [[Atal'ai Spaulders]] [[http://wow.allakhazam.com/db/item.html?witem=10783]] |
||
| − | ** [[Volcanic pieces]] [[http://wow.allakhazam.com/db/itemset.html?setid=141]] |
||
| − | |||
| − | When tanking also Stamina and Armor are the most important. Don't worry too much about defense, since it is not as important for a Druid tanking since you cannot get enough of it. You need stamina more than Defense. Stamina and Armor are the top two stats for druids. |
||
| − | |||
| − | === Fire Resistance Gear === |
||
| − | |||
| − | Ahh, the FR gear. There are a few times in MC that [[Fire Resistance]] is very helpful (and one that it's absolutely neccesary). Therefore, you should save all your fire resist items you run across. For this set, don't be afraid to toss in a few pieces of cloth - when you're wearing it, you won't be getting hit anyways. If you're just getting started collecting, here are a few easier ones to shoot for: |
||
| − | |||
| − | Trinkets: |
||
| − | * [[Royal Seal of Ele'tharas]] ([[DM]] trinket) [[http://www.thottbot.com/?i=38431]] |
||
| − | * [[Smoking Heart of the Mountain]] [[http://www.thottbot.com/?i=10516]] |
||
| − | * [[Blazing Emblem]] [[http://www.thottbot.com/?i=3765]] |
||
| − | * [[Ward of the Elements]] [[http://www.thottbot.com/?i=15385]] |
||
| − | |||
| − | [[Necklace]]: |
||
| − | * [[Drakefire Amulet]] [[http://www.thottbot.com/?i=4829]] |
||
| − | * [[Elder Magus Pendant]] [[http://www.thottbot.com/?i=35769]] |
||
| − | |||
| − | Rings: Not much here. Pick up the quest from [[Duke Hydraxis]] as soon as possible though - there's an FR ring at the end of the questline. |
||
| − | |||
| − | Weapons: Not much here either. However, for the offhand: |
||
| − | * [[Magebane Scion]] [[http://www.thottbot.com/?i=15681]] |
||
| − | * [[Skull of Burning Shadows]] [[http://www.thottbot.com/?i=21708]] |
||
| − | |||
| − | Back: |
||
| − | * [[Cape of the Fire Salamander]] [[http://www.thottbot.com/?i=5157]] |
||
| − | * [[Wildfire Cape]] [[http://www.thottbot.com/?i=20121]] |
||
| − | |||
| − | Armor: |
||
| − | * [[Dragonrider Boots]] [[http://www.thottbot.com/?i=38529]] |
||
| − | * [[Volcanic gear]] [[http://www.thottbot.com/?s=Volcanic]] |
||
| − | * [[Nightbrace Tunic]] (Perfect for Feral Druids) [[http://www.thottbot.com/?i=19205]] |
||
| − | * [[Flamescarred Girdle]] [[http://www.thottbot.com/?i=22029]] |
||
| − | * [[Flamescarred Shoulders]] (Perfect for Feral Druids) [[http://www.thottbot.com/?i=35816]] |
||
| − | * [[Cinderhide Armsplints]] [[http://www.thottbot.com/?s=Cinderhide]] |
||
| − | * Ugg - I could go on forever. Use advanced search on Allakhazam :) |
||
| − | |||
| − | See below for when to wear this stuff. The down and dirty version: [[Lava Pack]]s, [[Baron Geddon]], and [[Ragnaros]]. |
||
| − | |||
| − | == General Hints == |
||
| − | Hmm, general hints. Nothing in this section that isn't going to be common sense. |
||
| − | |||
| − | * Watch your [[aggro]] |
||
| − | * Don't be afraid to go [[Bear]] when you think a [[mob]] is going to gun for you |
||
| − | * [[Decurse]] when you can - if it's something you can [[cure]], cure it |
||
| − | * Conserve your mana by not overhealing - never know when you might need the extra boost |
||
| − | |||
| − | == Trash Mobs == |
||
| − | FYI - this isn't going to get into how your raid handles these encounters. Only to help what goes on with the druids. |
||
| − | |||
| − | === [[Molten Giant]]s/[[Molten Destroyer]]s === |
||
| − | For Giants, just keep your distance. Don't get aggro, keep your tanks up, and toss a few [[nuke]]s. No biggie at all. |
||
| − | |||
| − | For Destroyers, same deal except you'll need to heal a lot of splash damage as well. Make sure you stay out of range, the [[AE]] stun they do sucks. |
||
| − | |||
| − | === [[Lava Annihilator]]s === |
||
| − | Total pansies. Do what you want with these guys, just try not to grab aggro. |
||
| − | |||
| − | === [[Firelord]]s === |
||
| − | Make sure that your cleansers are doing their job. Heal when neccesary, feel free to nuke these guys down. Easy fights. |
||
| − | |||
| − | If you get 2 at once, you'll mostly be on healing duty. |
||
| − | |||
| − | === [[Lava Surger]]s === |
||
| − | Ug, surgers. If your raid wants everyone in melee range, then by god stay in melee range (might as well melee too). Keep rejuvs ticking on everyone in your group if you don't have a [[priest]] spamming [[Prayer]], maybe get a few Ticks of [[Tranquility]] off between surges. Basically, do what you can to keep everyone alive. |
||
| − | |||
| − | === [[Ancient Core Hound]]s === |
||
| − | Ahh, the big Core Hounds. These guys have several different special attacks, only a couple of which are really a pain. |
||
| − | |||
| − | WARNING: if you are a feral druid, you've probably been meleeing everything else in the instance. With these guys, try not to - they have a tendency to turn around and bite you for huge damage. |
||
| − | |||
| − | Besides the hounds that confuse and stun, these are cake. Heal/nuke, avoid melee range if you can. |
||
| − | |||
| − | === [[Fire Imp]]s === |
||
| − | There's only one spot that you have to fight Imps - right before [[Lucifron]]. They have random AEs they cast, so keep your distance. |
||
| − | |||
| − | These really don't hit hard, just don't stand in the middle of them. Keep everyone healed, and toss out a [[Hurricane]] when they're all stacked up. No biggie really. |
||
| − | |||
| − | === Core hound Packs === |
||
| − | If you aren't tanking a hound, this is easy. Just keep the tanks standing, and toss out a Hurricane sometime. Make sure you continue healing even after the dogs die, since the [[bleed]] they use HURTS. |
||
| − | |||
| − | If you end up tanking, suit up with your best AF/Stamina gear. Make sure that you have the right Dog targetted (usually someone sets up which tank is responsible for which dog). Use [[Enrage]] right before the pull, and use your taunt when it's running by. Use your [[Maul]]/[[Swipe]] whenever up, and don't be afraid to use your [[Frenzied Regen]] halfway through the fight if you have a lot of bleeds on you. Most importantly, just keep aggro. |
||
| − | |||
| − | === [[Lava Pack]]s === |
||
| − | Oh god, the lava packs. Biggest pain in the butt in the core. Load up on your FR gear - try to hit 100 unbuffed if you can. It helps A LOT. A dead Druid isn't helping anyone... |
||
| − | |||
| − | Make no mistakes - these fights, you'll be healing. Try not to heal too much if you can - if you do, one of the Rocks will b-line right at you when it becomes un-banished. Keep your tanks and warlocks standing - if they go down, bad things start to happen in a hurry. |
||
| − | |||
| − | Don't be afraid to go [[bearform]] if you have one of the rocks looking at you funny. Sure people might give you crap for standing around in Bear, but as soon as the rock comes unbanished and heads over to smack you, they'll understand :) |
||
| − | |||
| − | == [[Boss]]es == |
||
| − | |||
| − | === Lucifron === |
||
| − | |||
| − | [[Lucifron]] is the first fight in Molten Core, though this does not necessarily mean he's the easiest ([[magmadar]] has been [[nerf]]ed somewhat recently and I happen to think he's easier than Luci now). The Lucifron pull involves two guards plus the boss himself. Most guilds use a strategy wherein the boss is pulled to the top of the ramp on the right side, near the stalagmite/stalagtite formation, while the two adds are pulled further down the ramp, nearer to the camp, where they are quickly annihilated. Thus at the beginning of the fight there will be 3 main tanks, each with a designated hunter puller, at the top of the ramp, and everybody else (including druids) will be down the ramp (with the possible exception of a pally to heal the main tank while Luci is pounding on him at the beginning of the fight). This fact doesn't matter much to a druid, since druids will, for the most part, not be healing during this fight (see below). |
||
| − | ==== Abilities and Positioning ==== |
||
| − | Lucifron's main abilities include a magic effect called [[Impending Doom]] that deals 2000 [[shadow damage]] after 10 sec (during which time it had better get removed by somebody who can remove magic effects; druids can't, so I hope you've made friends with a [[paladin]]) and [[Lucifron's Curse]], which doubles the cost of all abilities (skills, spells, whatever, whether they use [[mana]], [[energy]], or [[rage]]). There are a couple others as well ([[mind control]], usually cast on the main tank, an [[aoe]] [[shadow shock]], and [[cleave]]), but basically all these mean to a druid is "don't stand too close to the boss." While we're on positioning, you want to stay at the bottom of the ramp at first, then move up to where Luci is being tanked. Under no circumstances should you go near the door of [[Magmadar]]'s cavern, since you can easily aggro several imp groups from there, which will do nasty things to your raid. |
||
| − | ==== A Druid's Role ==== |
||
| − | From a druid's perspective, this fight is all about [[decursing]], to remove Lucifron's curse. This fight becomes a LOT harder when everything you do takes twice as much mana (or energy, or rage)...even a guild with full [[BWL]] equipment might have trouble completing this fight if the curse never got removed. As such, the most important thing a druid can be doing in this fight is decursing. Leave healing to the priests unless you see somebody who is truly in trouble. |
||
| − | ==== Decursive ==== |
||
| − | There is a mod called "[[Decursive]]" out there which basically allows you to remove whatever debuffs your class is capable of removing (for druids, poisons and curses) by spamming a button, without having to switch targets. This mod lets you set priority lists for who gets decursed first...in this fight, my recommendation would be to get it off mana-using healers first, then worry about tanks, and finally get it off the DPS. I personally don't use this mod because I can switch targets manually before the global cooldown on my decurse spell is done anyway....but some people absolutely swear by Decursive for this fight. Outside of the decursing, keep your main tank alive, and you will win. |
||
| − | |||
| − | ==== Loot ==== |
||
| − | [[Loot]] of interest for druids includes the [[Cenarion Boots]], the [[Choker of Enlightenment]] (though you may have to step on the toes of a few DPS casters to get that one), and perhaps most impressive (and certainly most rare), [[Salamander Scale Pants]]. |
||
| − | |||
| − | === Magmadar === |
||
| − | |||
| − | [[Magmadar]] is the second fight in Molten Core. He lives right behind Luci in the big cavern, so after Lucifron he's quite easy to get to. Depending on who you ask, the Magmadar fight is either a bit easier or a bit harder than Luci, but still not too hard by comparison to what you'll be seeing later. |
||
| − | |||
| − | ====Abilities and Positioning==== |
||
| − | Magmadar has some rather nasty abilities and as such, positioning is important in this fight. First off, he enrages every so often and must be shot by a hunter with "[[Tranquilizing Shot]]" (a skill learned from a book dropped by Luci). Second, his [[Lava Breath]] ability will hit people in front of him who are standing too close, so melee people tend to like to sneak around behind him (near the back of the cavern) and attack from there. Third, he will spit lava at people, inflicting large amounts of fire damage over a few seconds. He will also lava bomb people, which not only inflicts damage on them, but also leaves a fire burning on the ground. Don't stand in the fire, it hurts a lot. Finally, his most annoying (and potentially [[wipe]]-generating) ability: every 30 seconds he will [[fear]] anybody within range of him, for a few seconds...usually just long enough for him to kill the main tank. The usual positioning for this fight has [[caster]]s in a half-circle around the front of the [[boss]], just outside of his fear range, and [[melee]] folks behind the boss, along with a few [[healer]]s at the very back of the cavern to take care of the melee. If you have a range-extending skill that lengthens the [[range]] on your heals/damage spells by 10 yards (to 40), you can stand in one place for the whole fight without getting feared. If not, it's a pretty simple matter to run back, out of range of his fear, every 30 seconds....especially if someone in your [[raid]] has the [[CTRaid]] mod that warns you 5 seconds before a fear attack is incoming. The value of spreading out is that if he lava-bombs one person, the person next them will not also be hit. |
||
| − | |||
| − | ====A Note Regarding Magmadar Tanking==== |
||
| − | If you have a dwarf priest, he can fear ward your main tank so that Magmadar's fear doesn't work on the [[MT]]. If not, "[[stance dancing]]" is the only option. I am informed by many folks who play tanks that stance dancing is somewhat complicated and requires a little practice. Therefore, do not be impatient with your main tank--keeping Magmadar's aggro in this fight is one of the greatest tanking challenges in Molten Core. As such, expect your main tank to screw it up a few times. It may cause a wipe, or it may not...but either way, just think of it as a challenge in healing, and enjoy trying to keep as many people alive as you can, if it happens. |
||
| − | |||
| − | ====A Druid's Role==== |
||
| − | For the Magmadar fight, druids' primary role is healing. The boss doesn't do any nasty curses, and he doesn't poison, so what else is there to do? Just keep the main tank up, heal casters and melee DPS who get lava spat at them, or lava bombed, or feared into a lava bomb fire. Be aware that most fire damage in this fight is of the [[damage-over-time]] persuasion, so [[heal-over-time]] spells like [[rejuvenation]] are quite valuable here. Unless somebody screws up, most healing will be on a single individual who is hurt relatively badly by one of magmadar's single-target offensive spells. Thus heals need to land on the main tank and whoever is hurt. If everybody is avoiding fear, and the main tank is holding aggro so Magmadar can't spin around and breathe fire on people, healing this fight is relatively laid back and easy. |
||
| − | |||
| − | ====Loot==== |
||
| − | Cenarion Leggings are the main thing you're interested in off Magmadar, as a healing druid. Salamander Scale Pants strike me as being better stat-wise (mana regen and +heal gear is, in my opinion, better than int and whatever else you get from these pants), but since only druids can wear the Cenarion Leggings, and since they're a much more common drop than the Sally Scale Pants, you'll probably wind up with a pair of the Cenarion ones, even if you don't want them. Magmadar also drops the Medallion of Steadfast might, which is very nice for bear form, and the Aged Core Leather Gloves, which are great for cat form and bear form FR tanking gear. |
||
| − | |||
| − | === Gehennas === |
||
| − | The [[Gehennas]] encounter is very similar to Lucifron |
||
| − | |||
| − | ====Abilities and Positioning==== |
||
| − | Gehennas' main abilities include a [[rain of fire]], a random [[Shadow Bolt]], and a curse called (surprise!) ''[[Gehennas' Curse]]'' that causes healing on the target to be reduced by 75%. |
||
| − | ====A Druid's Role==== |
||
| − | Coordinate with your fellow mages to decurse the MT and melee, heal as needed (or DPS as you like). Depending on the group makeup, the mage's DPS might be better use of their mana, so pick up the slack in decursing. |
||
| − | |||
| − | === Garr === |
||
| − | ====Abilities and Positioning==== |
||
| − | [[Garr]]'s little rock friends explode so keep your distance. Garr clears the buffs on the raid. |
||
| − | ====A Druid's Role==== |
||
| − | Because Garr clears buffs, it's pretty much a waste of mana to keep buffs on anyone. The only exception is the MT which may have loaded up on a few buffs of his own. Any [[MotW]]/[[Thorns]] will take up a slot. Therefore, it may help to toss on a Rank 1 MotW & Thorns to let those get eaten instead of the better buffs. |
||
| − | |||
| − | Healing is a standard fight. Be sure to keep the [[warlock]]s' [[VoidWalker]]s alive too. |
||
| − | |||
| − | DPS is standard. Just run away before the little ones explode. |
||
| − | |||
| − | === Baron Geddon === |
||
| − | [[Baron Geddon]] is arguably one of the funnest fights in MC for a druid. |
||
| − | |||
| − | ====Abilities and Positioning==== |
||
| − | Baron Geddon's abilities include [[Inferno]] ([[AoE]] pulse wave), [[Ignite Mana]], and his signature [[Living Bomb]] where the player becomes a bomb and explodes for 3200 dmg. If anyone's not paying attention, that person can easily wipe the raid by being the bomb in close proxmitiy to others. |
||
| − | |||
| − | Positioning for healing is to just stay out of range from the Inferno pulses. No FR is required for this fight for healing duty. |
||
| − | Positioning for DPS is to run away when Inferno pulses, and do not reengage until the MT has aggro. FR is helpful for this fight if DPSing to resist the initial Inferno pulses. |
||
| − | |||
| − | Finally, '''know''' where to go if you're the bomb, and keep an eye out to whoever is the bomb (and run away from them!) |
||
| − | ====A Druid's Role==== |
||
| − | For DPS, remember to run away when Inferno pulses, and do not reengage until the MT has aggro. Put on your FR gear. |
||
| − | |||
| − | For Healing, if you're high on your decurser's list, then you have nothing to fear from Ignite Mana. If you're not top priority, then shapeshift so that you have no mana, and wait for the [[DoT]] to be cleared from you. |
||
| − | |||
| − | If you're the Living Bomb, '''run to your designated area!!''' Do not sit there and blow up the raid! While running, toss yourself a Rejuvination and switch to Bear Form. This gives you an extra padding of HP for when the bomb goes off. When it does, you'll be tossed in the air. [[Shapeshift]] out and back into [[Cat Form]] to mitigate falling damage. Land, [[bandage]], and you're back in business. This "[[shape dancing]]" should allow you to stay alive no matter how many times you become the bomb. |
||
| − | |||
| − | === Shazzrah === |
||
| − | Almost everyone considers this a ranged fight because of [[Shazzrah]]'s [[Arcane Explosion]]s |
||
| − | ====A Druid's Role==== |
||
| − | Heal/Decurse shall be your duties. DPS if mana allows, but no DoTs (that means no Moonfire spam!) |
||
| − | |||
| − | === [[Sulfuron Harbringer]] === |
||
| − | ====A Druid's Role==== |
||
| − | Heal/DPS. Nothing special for a druid. |
||
| − | |||
| − | === [[Golemaag the Incinerator]] === |
||
| − | ====A Druid's Role==== |
||
| − | Heal/DPS. Nothing special for a druid. |
||
| − | |||
| − | === [[Majordomo Executus]] === |
||
| − | ====A Druid's Role==== |
||
| − | Heal/DPS. Nothing special for a druid. |
||
| − | |||
| − | === Ragnaros === |
||
| − | [[Ragnaros]] the Firelord is the final boss in Molten Core. |
||
| − | This is an extremely FR intensive fight. |
||
| − | ====Abilities and Positioning==== |
||
| − | There are numerous strategies available. I will mention the Sons of Flame though, as this part is important for druids. After 3 minutes of combat Ragnaros will summon 8 Sons of Flame. They do purely fire-based damage and have an AoE mana burn, so you need to keep them away from your mana-users. |
||
| − | ====A Druid's Role==== |
||
| − | Melee: Do what other melee's do.<br> |
||
| − | Ranged DPS: Do what other ranged DPS do.<br> |
||
| − | Healer: Do what other healers do. |
||
| − | |||
| − | Ragnaros can be engaged from ranged as soon as he is targable, so even if you are healing, be the fastest to draw first blood with that lightening quick [[Moonfire]] as soon as the MT steps into range! |
||
| − | |||
| − | During Phase 2 when the Sons of Flame come out, toss off your last few Rejuvinations and go Bear Form. Your job is to taunt the Sons off of the casters and hand them off to the tanks. Once the tank has taken aggro away from you, be ready to taunt the next Son that runs toward the casters. The tanks objective is to hold them in place away from the mana-users. ''Your'' main objective is to pull them away from the mana-users and give it to the tanks. Once you're sure all sons are taken care of, then help DPS them down. |
||
| − | |||
| − | After the Sons are down, your mana regen while in bear form should allow you to have a lot more mana than the other healers who were just healing through the Sons. Pickup the healing until the other healing classes can [[spirit]]-regen some mana. |
||
| − | |||
| − | All regular Druidish duties apply: [[Innervate]]s, [[Chain Battle Res]]ses, etc. |
||
| − | [[Category:Druids]] |
||
| − | [[Category:Guides]] |
||
| − | [[Category:Instance:Molten Core]] |
||
Revision as of 04:23, 9 October 2010
| Deeb | |
|---|---|
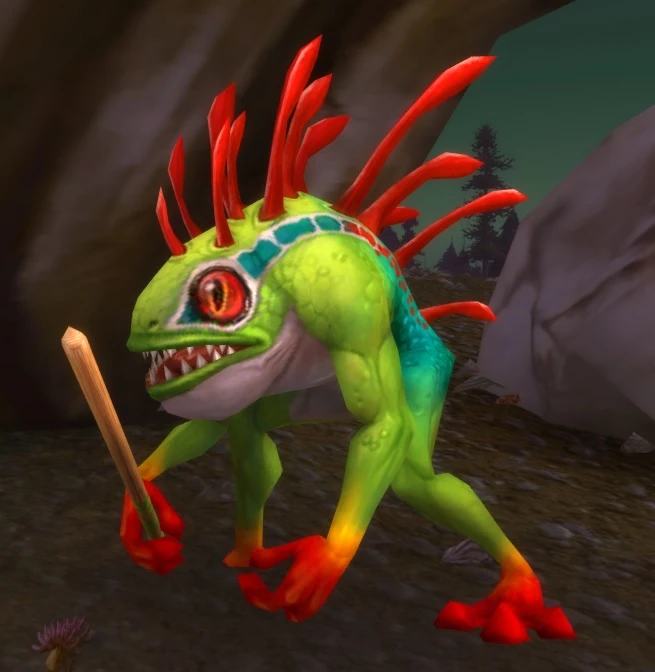 | |
| Race | Murloc |
| Level | 12 Rare |
| Location | North Coast, Tirisfal Glades |
Deeb is a level 12 rare mob murloc found standing idle on the North Coast in the Tirisfal Glades. It is on a 1.5-2.5 hour respawn timer.
Loot
Trivia
Together with another member of the Torn Fin tribe named Muad, Deeb is a reference to Muad'dib from Frank Herbert's book Dune.