Iggey25746 (talk | contribs) m (moved Frostmourne (WC3) to Frostmourne (Warcraft III)) |
Abazigal75417@legacy41591716 (talk | contribs) (→Quotes) |
||
| Line 1: | Line 1: | ||
| − | {{ |
+ | {{Stub/Strategy}} |
| − | {{ |
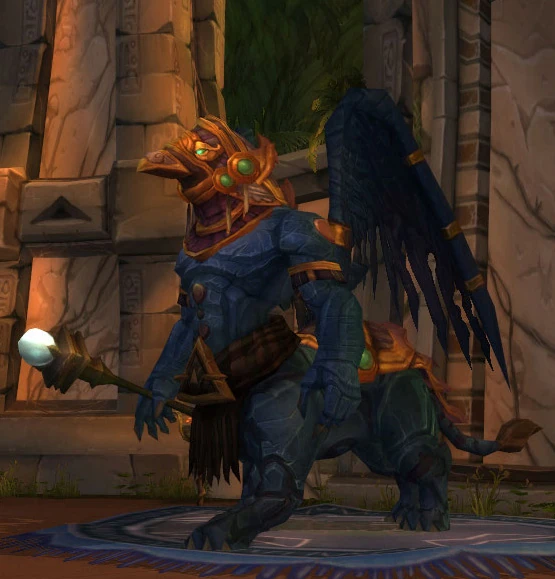
+ | {{npcbox |
| + | |name=High Prophet Barim |
||
| − | |image=WC3-H09.jpg |
||
| + | |image = High Prophet Barim.jpg |
||
| − | |name=Frostmourne |
||
| + | |race = Tol'vir |
||
| − | |prev=[[Dissension]] |
||
| + | |creature = Humanoid |
||
| − | |conflict=[[The Scourge of Lordaeron]] |
||
| + | |type = Elite |
||
| − | |date= |
||
| + | |level = 87 |
||
| − | |place=[[Drak'Tharon Keep]] |
||
| + | |location = [[Terrace of the Augurs]], [[Lost City of the Tol'vir]] |
||
| − | |result=Phyrric Alliance Victory |
||
| + | |faction = Combat |
||
| − | |side1=*[[Alliance of Lordaeron|Alliance Expedition]] |
||
| + | |health =1,659,880 (normal)<br/>3,734,730 (heroic) |
||
| − | |side2=*[[Undead Scourge|Undead Scourge]] |
||
| + | |mana =65,170 |
||
| − | |commanders1=*[[Arthas Menethil]] |
||
| + | |status= |
||
| − | *[[Muradin Bronzebeard]]† |
||
| + | |instance=Lost City of the Tol'vir |
||
| − | *[[Captain Luc Valonforth]] |
||
| − | |commanders2=*[[Mal'Ganis]]† |
||
| − | |forces1=*1 [[Paladin]] |
||
| − | *1 [[Mountain King]] |
||
| − | *1 [[Captain]] |
||
| − | *[[Peasant]]s/[[Militia]]s |
||
| − | *[[Human]] [[Footmen]] |
||
| − | *[[Dwarven]] [[Riflemen]] |
||
| − | *[[Human]] [[Knight]]s |
||
| − | *[[High Elf]] [[Priest]]s |
||
| − | *[[High Elf]] [[Sorceress]]s |
||
| − | *[[Mortar Team]]s |
||
| − | *[[Steam Tank]]s |
||
| − | *[[Dwarven gyrocopter]]s |
||
| − | *[[Wildhammer Dwarf|Wildhammer]] [[Gryphon]] [[Gryphon Rider|Riders]] |
||
| − | |forces2=*1 [[Dreadlord]] |
||
| − | *[[Acolyte]]s |
||
| − | *[[Ghoul]]s |
||
| − | *[[Crypt Fiend]]s |
||
| − | *[[Gargoyle]]s |
||
| − | *[[Necromancer]]s |
||
| − | **[[Skeletal Warrior|Skeleton Warriors]] |
||
| − | *[[Abomination]]s |
||
| − | *[[Frost Wyrm]]s |
||
| − | *[[Meat Wagon]]s |
||
| − | *[[Shade]]s |
||
| − | |casual1=*Very Heavy |
||
| − | |casual2=*Most of the Undead force |
||
}} |
}} |
||
| + | '''High Prophet Barim''' is a boss in the [[Lost City of the Tol'vir]]. |
||
| − | '''Frostmourne''' was the final battle between Prince [[Arthas Menethil]] and the dreadlord, [[Mal'Ganis]]. It was the climax of Arthas' pursuit of the dreadlord in his quest for vengeance against Mal'Ganis' acts against the people of Lordaeron. It would see Arthas taking up the accursed runeblade, [[Frostmourne]] at the expense of his [[Muradin Bronzebeard|old tutor and friend]]'s life and drive his cold, hungry, and exhausted forces to certain death while using the cursed sword's power to vanquish Mal'Ganis' forces and eventually the dreadlord himself. |
||
| − | While Arthas was in his search for the runeblade,the Alliance Captain bravely defended the Alliance base. It is not known what happen to him after the battle though he could have been killed in battle or by Arthas himself. |
||
| − | == |
+ | ==Abilities== |
| + | *{{abilities|Fifty Lashing|Deals 50 lashings, 5 at a time. Melee swings will cause a lashing for normal damage plus 5000.}} |
||
| − | Muradin angrily confronts Arthas over his betrayal of the mercenaries and his lies to his men. Arthas coldly retorts that Muradin never saw what Mal'Ganis did to his homeland. Suddenly, the undead appear on all sides. Mal'Ganis calls out to Arthas and taunts him that the journey ends here with Arthas' doom. The Alliance troops rush to defend the base, however, both Arthas and Muradin realize that they are outnumbered and completely surrounded. Arthas asks Muradin to help him find the runeblade [[Frostmourne]]. The sword's power might give them the edge they need to win this battle. Muradin, although hesitant, agrees. Arthas takes a small force of knights and riflemen with him, leaving the Captain behind to oversee the base's defenses. Arthas and his men enter a nearby [[Waygate]] which transports them to the vault of Frostmourne. |
||
| + | *{{abilities|Plague of Ages|Hurls a bolt of cursed blight at the enemy dealing 9546 Nature damage, and then jumping to additional nearby enemies.}} |
||
| + | *{{abilities|Heavens' Fury|Deals 15000 damage to all enemies within 4 yards}} |
||
| + | *{{abilities|Repentance|The target's soul is ripped from their body.}} |
||
| + | **{{abilities|Repentance|The caster is shrouded in a holy light, impervious to damage.|note=Buff on Barim}} |
||
| + | **{{abilities|Repentance|Rip the target's soul from their body, exposing them to the spirit world.|note=Debuff on players}} |
||
| + | **{{abilities|Hallowed Ground|The hallowed ground deals 9546 Holy damage to those who stand on it.}} |
||
| + | ;[[Harbinger of Darkness]] |
||
| − | ===Claiming Frostmourne=== |
||
| + | *{{abilities|Soul Sever|A fragment of your soul will be severed.}} |
||
| − | Arthas and Muradin battle through a number of vicious creatures - both living and undead to reach the Frostmourne. Finally, they arrive at the entrance to Frostmourne's chamber, where they find a powerful undead [[The Guardian|Guardian]] and its minions blocking the way. The Guardian warns Arthas to turn back, but Arthas refuses and engages the Guardian in battle. After a long and difficult fight which leaves only Arthas and Muradin standing, the Guardian is defeated. In its dying moments, the Guardian again warns Arthas to turn back before it's too late. Arthas asks the Guardian if it's still trying to protect the sword. The Guardian gives an ominous reply: It is trying to protect ''him'' from the sword. Arthas ignores this warning and enters Frostmourne's chamber. |
||
| + | *{{abilities|Wail of Darkness|Inflicts 5045 Shadow damage to an enemy}} |
||
| + | *{{abilities|Wail of Darkness|Deals 22049 Shadow damage to nearby targets, ripping them out of the spirit world}} |
||
| + | ==Strategy== |
||
| − | Arthas and Muradin approach Frostmourne which is held on a frozen pedestal. Arthas goes to claim the sword, but Maradin notices an inscription on the pedestal: ''Whomsoever takes up this blade shall wield power eternal. Just as the blade rends flesh, so must power scar the spirit.'' Muradin realizes the sword is cursed, but Arthas replies that he would bear any curse to save his people. Muradin tries one last time to reason with Arthas, telling him to forget his quest and go home. Arthas, however, will let nothing stop him from getting his revenge on Mal'Ganis. |
||
| + | *Baram periodically gains the Fifty Lashing buff, greatly increasing the damage that he does to the tank. The healer and tank should use cooldowns if need be. |
||
| + | *Periodically, random players are targeted by Heaven's Fury (looks like a bolt of light from the sky). They should run out of it. |
||
| + | *At around 50%, Baram casts Repentance, pulling all players to him and stunning them. After a few seconds, everyone is knocked back and sent out into the spirit world. |
||
| + | **Baram is immune to all damage while channeling Repentance or in the spirit world. |
||
| + | **A Harbinger of Darkness will appear; the tank needs to immediately taunt it. Showing enemies nameplates may make it easier to see. |
||
| + | **Everyone needs to stay out of the glowing ground around Barim or they will take damage from Hallowed Ground. |
||
| + | *After the Harbinger of Darkness dies, phase one repeats until Barim dies. |
||
| + | *The phoenix that spawns on Heroic Mode can and should be kited away from the rest of the group by ranged DPS. |
||
| + | ==Heroic Mode== |
||
| − | Arthas calls out to the spirits of the chamber and promises to pay any price if they will grant him the power to save his people. A sinister whisper answers and suddenly the pedestal explodes releasing Frostmourne. A piece of frozen shrapnel hits Muradin seemingly killing him. Arthas, completely unmoved by his friend's demise, tosses aside his paladin warhammer and picks up the blade. |
||
| + | A phoenix add spawns immediately after pulling the Boss. The dps can either down this quickly and wait for it to respawn (takes about 30 seconds), or have someone kite it around the battle area until the Boss gets to phase two, either option is viable. |
||
| + | The phoenix will morph into an egg if it takes enough damage. While in egg form, it regenerates health unless consistently damaged. The phoenix can be neutralized by simply allowing it to remain in egg form, dotting the egg or inflicting some damage on it so it never reaches 100%. |
||
| + | In phase two (Repentance), all of the dps needs to keep as much distance from the tank as possible while they kite the Heart of Darkness. A single Soul Fragment reaching the Heart of Darkness will bring the party down by roughly 70k hp. The tank needs to make sure that he is slowly turning and kite in a circle as well. If you get too far from the boss--you will take fall damage when he pulls you back in for phase three. |
||
| − | ===Arthas's Vengeance=== |
||
| − | Now in possession of Frostmourne, Arthas returns to his base where the Captain is desperately trying to hold off the undead. Arthas rallies his remaining men and leads a counterattack against Mal'Ganis. Despite suffering heavy casualties, the Alliance forces storm Mal'Ganis's base and proceed to raze it building by building. Frostmourne proves to be an incredibly powerful weapon and Arthas single-handedly slays countless undead with it. Finally, Arthas stands victorious over the ruins of Mal'Ganis's base. |
||
| + | Also, the second phase includes random fire circles all over the ground that you have to avoid. |
||
| − | Mal'Ganis reveals himself to Arthas. The dreadlord compliments Arthas on claiming Frostmourne at the expense of his comrades' lives - just as the [[Lich King|Dark Lord of the Dead]] foretold. Arthas declares that he hears only the voice of Frostmourne. Mal'Ganis replies that Arthas hears the voice of the Dark Lord, who speaks through Frostmourne. The dreadlord then mockingly asks what the Dark Lord tells Arthas now. |
||
| + | ==Quotes== |
||
| − | Frostmourne's sinister whispering is heard again. After a moment, Arthas answers that the Dark Lord (Lich King) tells him that the time for his vengeance has come. Mal'Ganis is shocked by this statement but is unable to defend himself in time. Arthas vanquishes the dreadlord with one strike from Frostmourne. Having achieved his vengeance, Arthas abandons his remaining men and wanders off into the frozen wastelands of Northrend where he loses the rest of his sanity to Frostmourne's dark voice. |
||
| + | ;Aggro |
||
| + | *{{text|yell|Begone infidels, you are not welcome here!}} |
||
| + | ;Repentance |
||
| − | ===Aftermath=== |
||
| + | *{{text|yell|Kneel before me and repent!}} |
||
| − | Although Arthas achieved his victory over Mal'Ganis, he had sold his soul to the Lich King. Thus the Lich King gained his most powerful servant ever. Arthas became the first of the Lich King's [[Death Knight]]s. Upon returning home, Arthas murdered his own father and allowed the Scourge to devour the rest of [[Lordaeron]]. Ultimately, Arthas's quest to save his people ended with their destruction by his own hand. |
||
| + | ;Killing a player |
||
| − | ===The "Deaths" of Muradin and Mal'Ganis=== |
||
| + | *{{text|yell|May peace find you now.}} |
||
| − | Although Muradin appeared to have been killed when Frostmourne was released, it has been recently revealed that he was only rendered unconscious. However, when Muradin awoke he had no recollection of what had happened or even who he was. It is unknown at this point whether Muradin will regain his memory. |
||
| + | ;Death |
||
| − | Likewise, Mal'Ganis was seemingly killed by Arthas. However, it has been recently revealed in [[Wrath of the Lich King]] that Mal'Ganis actually survived Arthas's attack. The dreadlord was weakened and forced into hiding. Mal'Ganis currently possess the body of [[Barean Westwind]] and is plotting to exact his revenge upon the Lich King. |
||
| + | *{{text|yell|Death is only the beginning!}} |
||
| + | ==Loot== |
||
| + | {{lootbox|Normal |
||
| + | |Balkar's Waders |
||
| + | |Greaves of Wu the Younger |
||
| + | |Resonant Kris |
||
| + | |Ring of the Darkest Day |
||
| + | |Tauntka's Necklace |
||
| + | }} |
||
| + | |||
| + | {{lootbox|Heroic |
||
| + | |Balkar's Waders (heroic) |
||
| + | |Greaves of Wu the Younger (heroic) |
||
| + | |Resonant Kris (heroic) |
||
| + | |Ring of the Darkest Day (heroic) |
||
| + | |Tauntka's Necklace (heroic) |
||
| + | }} |
||
| + | |||
| + | ==Videos== |
||
| + | <youtube>0GgWaUhU6-g</youtube><br> |
||
| + | |||
| + | ==External links== |
||
| + | <!-- Read http://www.wowpedia.org/Wowpedia:External_links before posting your links here. |
||
| + | Links that do not conform to the rules will be DELETED. |
||
| + | Repeat violations may result in a BAN. |
||
| + | Have a nice day. :) --> |
||
| + | {{elinks-NPC|43612|armory=1}} |
||
| + | {{DEFAULTSORT:Barim, High Prophet}} |
||
| − | [[Category: |
+ | [[Category:Tol'vir]] |
| + | [[Category:Bosses]] |
||
| + | [[Category:Lost City of the Tol'vir mobs]] |
||
Revision as of 07:07, 22 February 2011
 | |||||||
| Race | Tol'vir (Humanoid) | ||||||
| Level | 87 Elite | ||||||
| Location | Terrace of the Augurs, Lost City of the Tol'vir | ||||||
| |||||||
High Prophet Barim is a boss in the Lost City of the Tol'vir.
Abilities
- Fifty Lashing — Deals 50 lashings, 5 at a time. Melee swings will cause a lashing for normal damage plus 5000.
- Plague of Ages — Hurls a bolt of cursed blight at the enemy dealing 9546 Nature damage, and then jumping to additional nearby enemies.
- Heavens' Fury — Deals 15000 damage to all enemies within 4 yards
- Repentance — The target's soul is ripped from their body.
- Repentance — The caster is shrouded in a holy light, impervious to damage.
- Repentance — Rip the target's soul from their body, exposing them to the spirit world.
- Hallowed Ground — The hallowed ground deals 9546 Holy damage to those who stand on it.
- Soul Sever — A fragment of your soul will be severed.
- Wail of Darkness — Inflicts 5045 Shadow damage to an enemy
- Wail of Darkness — Deals 22049 Shadow damage to nearby targets, ripping them out of the spirit world
Strategy
- Baram periodically gains the Fifty Lashing buff, greatly increasing the damage that he does to the tank. The healer and tank should use cooldowns if need be.
- Periodically, random players are targeted by Heaven's Fury (looks like a bolt of light from the sky). They should run out of it.
- At around 50%, Baram casts Repentance, pulling all players to him and stunning them. After a few seconds, everyone is knocked back and sent out into the spirit world.
- Baram is immune to all damage while channeling Repentance or in the spirit world.
- A Harbinger of Darkness will appear; the tank needs to immediately taunt it. Showing enemies nameplates may make it easier to see.
- Everyone needs to stay out of the glowing ground around Barim or they will take damage from Hallowed Ground.
- After the Harbinger of Darkness dies, phase one repeats until Barim dies.
- The phoenix that spawns on Heroic Mode can and should be kited away from the rest of the group by ranged DPS.
Heroic Mode
A phoenix add spawns immediately after pulling the Boss. The dps can either down this quickly and wait for it to respawn (takes about 30 seconds), or have someone kite it around the battle area until the Boss gets to phase two, either option is viable. The phoenix will morph into an egg if it takes enough damage. While in egg form, it regenerates health unless consistently damaged. The phoenix can be neutralized by simply allowing it to remain in egg form, dotting the egg or inflicting some damage on it so it never reaches 100%.
In phase two (Repentance), all of the dps needs to keep as much distance from the tank as possible while they kite the Heart of Darkness. A single Soul Fragment reaching the Heart of Darkness will bring the party down by roughly 70k hp. The tank needs to make sure that he is slowly turning and kite in a circle as well. If you get too far from the boss--you will take fall damage when he pulls you back in for phase three.
Also, the second phase includes random fire circles all over the ground that you have to avoid.
Quotes
- Aggro
- Begone infidels, you are not welcome here!
- Repentance
- Kneel before me and repent!
- Killing a player
- May peace find you now.
- Death
- Death is only the beginning!
Loot
|
|
Videos