RogueMastermind@legacy41568043 (talk | contribs) |
@legacy40365158 (talk | contribs) No edit summary |
||
| Line 1: | Line 1: | ||
| − | {{ |
+ | {{npcbox |
| + | |name=Warlord Gar'dul |
||
| ⚫ | |||
| + | |image=Warlord Gar'dul.jpg |
||
| − | |name=Isle of Conquest |
||
| + | |race=Orc |
||
| − | |ss=Isle of Conquest Loading.jpg |
||
| + | |creature=Humanoid |
||
| − | |capital= |
||
| − | | |
+ | |level=33 |
| + | |type=Elite |
||
| − | |level=71 to 80 |
||
| ⚫ | |||
| − | |loc=Offshore of [[Icecrown]], [[Northrend]] |
||
| + | |aggro={{aggro|-1|1}} |
||
| + | |health=2,220 |
||
| + | |repfaction=Orgrimmar |
||
| + | |location=[[Desolation Hold]], [[Southern Barrens]] |
||
| + | |status=Deceased |
||
}} |
}} |
||
| − | [[File:WorldMap-IsleofConquest.jpg|thumb|Zone map]] |
||
| + | '''Warlord Gar'dul''' is the former leader of [[Desolation Hold]] in [[Southern Barrens]]. He ignored [[Crawgol]]'s warnings and created [[Desolation Hold]] over a former [[Silithid]] colony. While in charge of region the cataclysm struck, [[Honor's Stand]] was captured and [[Camp Taurajo]] was sacked, both acts being done by the [[Alliance]]. Following this Gar'dul decided to bide his time until he felt the [[Horde]] forces in the area were ready to strike back against the Alliance. |
||
| − | :''An island somewhere off the shores of Northrend. A rock, hardly worth a second look. But as insignificant as it may seem, this is no ordinary place. A sound of thunder as waves crash endlessly against rocky cliffs; a sound of fury as swords clash on the blood-stained fields of this island on the edge of forever.'' |
||
| + | However Gar'dul would never get his chance to strike back against the Alliance for [[Warlord Bloodhilt]] had come to the region at the best of [[Garrosh Hellscream|Warchief Garrosh Hellscream]]. After combating the Alliance forces under Bloodhilt's orders Horde adventures were sent report to Gar'dul and tell him that Bloodhilt was coming to Desolation Hold. Upon hearing this Gar'dul becomes nervous and tries to convince said Horde adventures that he has the situation well in hand. However when reminded about Camp Taurajo, he claims that supplies have become tight, he has a manpower shortage, and tries one last time to prevent Bloodhilt from coming. |
||
| − | :''Welcome to the Isle of Conquest.'' |
||
| + | When told that Bloodhilt is almost there Gar'dul goes even more nervous and convinces the messenger to set up a private meeting between Gar'dul, Bloodhilt, and the messenger in the northern tower in Desolation Hold. When Bloodhilt arrives he and Gar'dul have a short exchange where Gar'dul claims that he has been reinforced the Horde's grip in the Southern Barrens. Bloodhilt correctly points out that it was the player that helped reinforce the Horde's control in the region. Gar'dul points out that the Alliance has gotten reinforcements from the [[Eastern Kingdoms]] and that he has been cut off only to be interrupted by Bloodhilt who relives him of command. In rage Gar'dul refuses and attacks Bloodhilt and the player and yields when beaten. Bloodhilt in raged that he yielded asks him what part of "Victory or Death" did he not understand before throwing him out of the tower window to his death. |
||
| − | The '''Isle of Conquest''' is a point of strategic importance for the Alliance and Horde campaigns in Northrend. Serving as an ideal staging ground for operations in [[Icecrown]], each side is determined to secure control of the island. With the [[7th Legion]] and the [[Kor'kron Guard]] locked in deadly combat, both factions have issued a call to arms in hopes of tipping the scales in their favor and defeating the opposing general. |
||
| + | Warlord Bloodhilt then assumes command of Desolation Hold. |
||
| − | The ongoing struggle between [[Horde]] and [[Alliance]] has turned many once peaceful (and some not-so peaceful) places into theaters of constant war. The Isle of Conquest is the latest such place, set to be the location of a battle of epic proportions over the island's precious resources. |
||
| + | == Quotes == |
||
| − | An [[Halford Wyrmbane (tactics)|Alliance]] and a [[Overlord Agmar (tactics)|Horde General]] are fighting for dominance, overseeing the action from the safety of their keeps. Whichever side manages to eliminate the enemy general first will triumph on the island; failure to protect your leader will bring shame, dishonor, and defeat. There is no peace accord here, and it's an all-out war between the factions. |
||
| + | :''This is Desolation Hold, <class>. Here we bide our time until we are ready to strike back against the [[Alliance]].'' |
||
| + | ===Final Fight=== |
||
| − | The Isle's specific location is of Northwest of Sholazar Basin and West of Onslaught Harbour, you can see both barely with your view distance maxed out on the respective sides of the island. |
||
| + | :{{text|say|Warlord Gar'dul|Thank you, <name>. I trust you will, ah, defer to my authority on this matter.}} |
||
| − | == Once More unto the breach... == |
||
| + | :{{text|say|Warlord Bloodhilt|So this is where you're hiding Gar'dul.}} |
||
| − | Isle of Conquest, a battleground introduced in patch 3.2.0, [[Patch 3.2.0|Call of the Crusade]], pits teams of up to 40 players against each other in a massive battle over this small island off [[Northrend]]'s northern coast. To win, your team will need to make use of the island's unique strategic locations including an oil derrick, a siege workshop, and a fully equipped airship hangar. You will deploy devastating siege weaponry on the field; Light have mercy on anyone caught between you and your ultimate target, the general holed up in the enemy keep. |
||
| + | :{{text|say|Warlord Gar'dul|Hiding? Listen Bloodhilt - I've, ah, reinforced our grip on the Barrens.}} |
||
| + | :{{text|say|Warlord Bloodhilt|You cower behind your walls! If it wasn't for <name> here the Alliance would be marching through Mulgore.}} |
||
| + | :{{text|say|Warlord Gar'dul|But they've, ah, they've gotten reinforcements! From the Eastern Kingdoms. Whereas I've been, ah, cut off -}} |
||
| + | :{{text|say|Warlord Bloodhilt|Your excuses sicken me! Consider yourself relieved from command.}} |
||
| + | :{{text|say|Warlord Gar'dul|Relieved? Over my dead body!}} |
||
| + | :{{text|say|Warlord Bloodhilt|So! You DO have a spine.}} |
||
| + | ''Warlord Gar'dul turns hostile! Defeat him together with Warlord Bloodhilt!'' |
||
| + | :{{text|say|Warlord Gar'dul| Wait, ah - wait! I yield. I yield!}} |
||
| + | :{{text|say|Warlord Bloodhilt|Yield? You ... YIELD?}} |
||
| + | :{{text|say|Warlord Bloodhilt|What part of "Victory or Death" don't you understand?}} |
||
| + | ''Bloodhilt grabs Gar'dul and throws him out of the window!'' |
||
| + | == Quests == |
||
| − | There are five points of interest on the Isle of Conquest for the factions to battle over. Each one offers its own benefits and strategic value. Which one will you claim for your side, and will it be enough to ensure victory? |
||
| + | *{{questlong|Horde|33|Desolation Hold Inspection}} {{questfinish}} |
||
| − | |||
| + | *{{questlong|Horde|33|Changing of the Gar'dul}} {{queststart}} |
||
| − | Winners receive 3 of the [[Isle of Conquest Mark of Honor|Isle of Conquest Mark of Honor]] [[item]], the losing team receives 1. |
||
| − | |||
| − | == Capture locations == |
||
| − | [[File:Refinery.jpg|thumb|Refinery]] |
||
| − | [[File:Quarry.jpg|thumb|Quarry]] |
||
| − | [[File:Docks.jpg|thumb|Docks]] |
||
| − | [[File:Airship Hangar.jpg|thumb|Hangar]] |
||
| − | [[File:IOC Workshop.jpg|thumb|Workshop]] |
||
| − | |||
| − | Consider your options before storming out of your keep to confront the enemy head-on. Spread throughout the Isle of Conquest are several capturable locations, each granting a unique strategic advantage to your team. |
||
| − | |||
| − | ;The [[Refinery (Isle of Conquest)|Refinery]]: Located on the northwestern end of the island, this smudge in the Frozen Sea produces enough black gold to run a thousand siege engines. Taking this resource gives 15% siege weapon increase, garners precious reinforcements and a continuous flow of honor to the side that controls it. |
||
| − | |||
| − | ;The [[Quarry]]: This snow-covered assembly, located on the southeastern end of the island, hides untapped supplies that must be harvested. Taking this resource grants 15% siege increase, and a continuous flow of reinforcements and honor to the side that controls it. |
||
| − | |||
| − | ;The [[Docks]]: The western shore's docks will further expand your selection of siege weapons with the devastating new [[Glaive Thrower (Isle of Conquest)|Glaive Thrower]] and the [[Catapult (Isle of Conquest)|Catapult]]. Unleash the destruction of the Glaive Thrower upon the walls of the keep with it's incredible range, or launch your invading party over the walls to assault the keep from within. It's worth noting the the Horde can place Glaive Throwers on a peninsula to the West of the Alliance castle and hit their Western gate out of range of the defending cannons. |
||
| − | |||
| − | ;The [[Hangar]]: This sturdy steel structure stands on the peak of Mt. Conquest overlooking the eastern side of the island, allowing players to board the airship docked there. This devastating weapon of war is capable of raining death upon the heads of your enemies and destroying enemy defenses. Once onboard the airship, players will find it comes equipped with parachutes enabling a strike team to drop into the enemy keep from above. |
||
| − | |||
| − | ;The [[Workshop (Isle of Conquest)|Workshop]]: Situated right between the Alliance base and the Horde base, this siege workshop occupies a strategic hot spot. Seizing it grants the controlling party the ability to utilize an arsenal of siege vehicles perfectly suited to reducing the enemy keep's walls to dust and ashes. |
||
| − | |||
| − | ;Graveyards: There are five graveyards in the Isle of Conquest that are attached to different points of interest on the map: the Horde base, the Alliance base, an oil spill island in the center of the map (attached to the siege workshop), the Airship Hanger, and the Docks. |
||
| − | : Two additional graveyards of last resort, used only when a faction does not have full control of any of the five primary graveyards, can be found on the northeast and southwest corners of the map, for the Horde and Alliance respectively. These two graveyards cannot be captured by the opposing faction. |
||
| − | {{Zone Map|zone=Isle of Conquest|notes= |
||
| − | {{Zone Map Note|34.9|24.8|POI150|Refinery}} |
||
| − | {{Zone Map Note|63.6|82.4|POI16|Quarry}} |
||
| − | {{Zone Map Note|33.5|53.8|POI145|Docks}} |
||
| − | {{Zone Map Note|57.6|51.0|POI140|Hangar}} |
||
| − | {{Zone Map Note|50.2|52.7|POI135|Workshop}} |
||
| − | {{Zone Map Note|46.5|23.9|POI10|Horde Keep}} |
||
| − | {{Zone Map Note|49.5|79.8|POI11|Alliance Keep}} |
||
| − | {{Zone Map Note|50.5|23.0|POI8|Horde graveyard}} |
||
| − | {{Zone Map Note|52.9|80.9|POI8|Alliance graveyard}} |
||
| − | {{Zone Map Note|44.7|52.8|POI8|Workshop graveyard}} |
||
| − | {{Zone Map Note|62.1|51.3|POI8|Hangar graveyard}} |
||
| − | {{Zone Map Note|30.4|60.7|POI8|Docks graveyard}} |
||
| − | {{Zone Map Note|66.7|31.8|POI13|Horde graveyard of last resort}} |
||
| − | {{Zone Map Note|31.7|70.9|POI15|Alliance graveyard of last resort}} |
||
| − | }} |
||
| − | |||
| − | == Main objectives == |
||
| − | ;The Keeps: The [[Horde Keep|Horde]] and [[Alliance Keep|Alliance keeps]] sit at opposite ends of the island. These citadels host six easily accessible defensive cannons set on the ramparts, capable of unleashing hot fury onto oncoming attackers. [[Huge Seaforium Bombs|Additional explosives]] sit safely stowed in the base of the keep along the back wall. At least, they're safe as long as they don't fall into enemy hands. If they do, though, they can be employed to bring the stone walls down from within, which is actually their only purpose. |
||
| − | |||
| − | ;The General: Holed up behind the keeps' massive walls, the generals, each with a couple of non-elite guards, command their forces from a position of relative safety. Should the keep fall and the general be slain, the Isle of Conquest will fall to the victor. |
||
| − | |||
| − | ;Reinforcements: Isle of Conquest uses a reinforcements system similar to that of [[Alterac Valley]]. The clock is ticking and every individual counts. If too many of your comrades fall to the enemy the battle will end in defeat. Killing enemy players will reduce their reinforcements by one for each kill, Once your faction's reinforcements reach their limit, so too does your bid for control of the island and the wealth of resources you've fought so hard over. |
||
| − | |||
| − | ''An island somewhere off the shores of Northrend. A rock, hardly worth a second look. A test of strength. A chance to prove your might, to crush your enemies, to make a difference, a chance for endless glory and conquest.'' |
||
| − | |||
| − | ''Will you seize it?''<ref name="IsleConquest">[[image:Blizz.gif]] http://www.worldofwarcraft.com/info/underdev/3p2/isleofconquest.xml</ref> |
||
| − | |||
| − | ==Achievements== |
||
| − | {{:Player vs. Player achievements/Isle of Conquest}} |
||
| − | |||
| − | ==Videos== |
||
| − | <videogallery> |
||
| − | Video:Gameplay Isle of Conquest |
||
| − | Video:Isle of Conquest - World of Warcraft PTR 3.2 First Look (HD) (PART 1) |
||
| − | Video:Isle of Conquest - World of Warcraft PTR 3.2 First Look (HD) (PART 2) |
||
| − | Video:Isle of Conquest - World of Warcraft PTR 3.2 No Man's Land Exploration (HD) (PART 3) |
||
| − | </videogallery> |
||
== Patch changes == |
== Patch changes == |
||
| ⚫ | |||
| − | * {{patched|date=2009-08-08|bluenote=Players on vehicles, when the Isle of Conquest battleground ends, will now properly receive the appropriate number of Isle of Conquest Marks of Honor.|link=http://blue.mmo-champion.com/23/19110152523-recent-ingame-fixes--august-2009.html}} |
||
| − | * {{patched|date=2009-08-06|bluenote=The Generals in Isle of Conquest now do less damage.|link=http://blue.mmo-champion.com/23/19110152523-recent-ingame-fixes--august-2009.html}} |
||
| ⚫ | |||
| − | |||
| − | == References == |
||
| − | {{reflist}} |
||
== External links == |
== External links == |
||
| − | <!-- Read http://www. |
+ | <!-- Read http://www.wowpedia.org/Wowpedia:External_links before posting your links here. |
Links that do not conform to the rules will be DELETED. |
Links that do not conform to the rules will be DELETED. |
||
Repeat violations may result in a BAN. |
Repeat violations may result in a BAN. |
||
Have a nice day. :) --> |
Have a nice day. :) --> |
||
| − | {{Elinks- |
+ | {{Elinks-NPC|37811}} |
| + | |||
| − | * {{elink|site=Under Development|icon=blizzard|desc=''The Future of Battlegrounds - Q&A'', an interview with [[Cory Stockton]], the Lead Content Designer|link=http://www.worldofwarcraft.com/info/underdev/battleground-qna.html}} |
||
| + | {{Succession|None|'''Leader of [[Desolation Hold]] '''|[[Warlord Bloodhilt]]}} |
||
| − | * {{elink|link=http://blue.mmo-champion.com/1/10222324845-qa-crusaders-coliseum-and-isle-of-conquest.html|site=MMO-Champion BlueTracker|icon=wowbluetracker|desc=Q&A: Crusaders' Coliseum and Isle of Conquest, archived from the official EU Forums}} |
||
| + | |||
| + | {{DEFAULTSORT:Gar'dul, Warlord}} |
||
| − | {{Isle of Conquest}} |
||
| + | [[Category:Orcs]] |
||
| − | {{Battlegrounds}} |
||
| − | [[Category: |
+ | [[Category:Quest givers]] |
| + | [[Category:Southern Barrens NPCs]] |
||
Revision as of 11:10, 7 May 2011
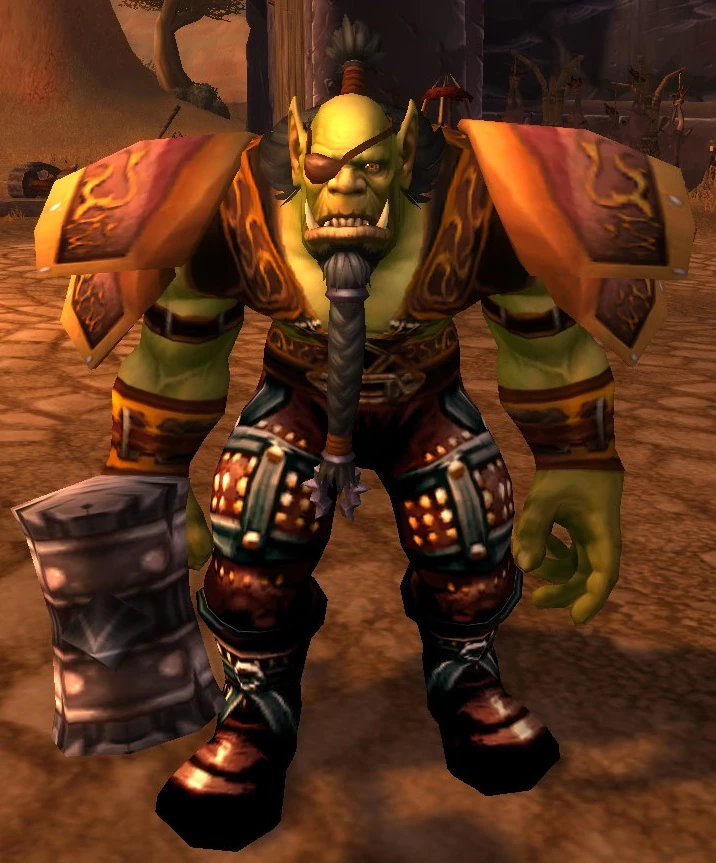 | |
| Race | Orc (Humanoid) |
| Level | 33 Elite |
| Reaction | Alliance Horde |
| Affiliation(s) | Orgrimmar |
| Location | Desolation Hold, Southern Barrens |
| Status | Deceased |
Warlord Gar'dul is the former leader of Desolation Hold in Southern Barrens. He ignored Crawgol's warnings and created Desolation Hold over a former Silithid colony. While in charge of region the cataclysm struck, Honor's Stand was captured and Camp Taurajo was sacked, both acts being done by the Alliance. Following this Gar'dul decided to bide his time until he felt the Horde forces in the area were ready to strike back against the Alliance.
However Gar'dul would never get his chance to strike back against the Alliance for Warlord Bloodhilt had come to the region at the best of Warchief Garrosh Hellscream. After combating the Alliance forces under Bloodhilt's orders Horde adventures were sent report to Gar'dul and tell him that Bloodhilt was coming to Desolation Hold. Upon hearing this Gar'dul becomes nervous and tries to convince said Horde adventures that he has the situation well in hand. However when reminded about Camp Taurajo, he claims that supplies have become tight, he has a manpower shortage, and tries one last time to prevent Bloodhilt from coming.
When told that Bloodhilt is almost there Gar'dul goes even more nervous and convinces the messenger to set up a private meeting between Gar'dul, Bloodhilt, and the messenger in the northern tower in Desolation Hold. When Bloodhilt arrives he and Gar'dul have a short exchange where Gar'dul claims that he has been reinforced the Horde's grip in the Southern Barrens. Bloodhilt correctly points out that it was the player that helped reinforce the Horde's control in the region. Gar'dul points out that the Alliance has gotten reinforcements from the Eastern Kingdoms and that he has been cut off only to be interrupted by Bloodhilt who relives him of command. In rage Gar'dul refuses and attacks Bloodhilt and the player and yields when beaten. Bloodhilt in raged that he yielded asks him what part of "Victory or Death" did he not understand before throwing him out of the tower window to his death.
Warlord Bloodhilt then assumes command of Desolation Hold.
Quotes
- This is Desolation Hold, <class>. Here we bide our time until we are ready to strike back against the Alliance.
Final Fight
- Warlord Gar'dul says: Thank you, <name>. I trust you will, ah, defer to my authority on this matter.
- Warlord Bloodhilt says: So this is where you're hiding Gar'dul.
- Warlord Gar'dul says: Hiding? Listen Bloodhilt - I've, ah, reinforced our grip on the Barrens.
- Warlord Bloodhilt says: You cower behind your walls! If it wasn't for <name> here the Alliance would be marching through Mulgore.
- Warlord Gar'dul says: But they've, ah, they've gotten reinforcements! From the Eastern Kingdoms. Whereas I've been, ah, cut off -
- Warlord Bloodhilt says: Your excuses sicken me! Consider yourself relieved from command.
- Warlord Gar'dul says: Relieved? Over my dead body!
- Warlord Bloodhilt says: So! You DO have a spine.
Warlord Gar'dul turns hostile! Defeat him together with Warlord Bloodhilt!
- Warlord Gar'dul says: Wait, ah - wait! I yield. I yield!
- Warlord Bloodhilt says: Yield? You ... YIELD?
- Warlord Bloodhilt says: What part of "Victory or Death" don't you understand?
Bloodhilt grabs Gar'dul and throws him out of the window!
Quests
Patch changes
 Patch 4.0.3a (2010-11-23): Added.
External links
| Preceded by: None |
Position: Leader of Desolation Hold |
Succeeded by: Warlord Bloodhilt |