Flaicher19859@legacy41540581 (talk | contribs) mNo edit summary |
@legacy40365158 (talk | contribs) No edit summary |
||
| Line 1: | Line 1: | ||
| − | {{ |
+ | {{npcbox |
| + | |name=Warlord Gar'dul |
||
| ⚫ | |||
| + | |image=Warlord Gar'dul.jpg |
||
| − | |name=Isle of Conquest |
||
| + | |race=Orc |
||
| − | |ss=Isle of Conquest Loading.jpg |
||
| + | |creature=Humanoid |
||
| − | |capital= |
||
| − | | |
+ | |level=33 |
| + | |type=Elite |
||
| − | |level=71 to 80 |
||
| ⚫ | |||
| − | |loc=Offshore of [[Icecrown]], [[Northrend]] |
||
| + | |aggro={{aggro|-1|1}} |
||
| + | |health=2,220 |
||
| + | |repfaction=Orgrimmar |
||
| + | |location=[[Desolation Hold]], [[Southern Barrens]] |
||
| + | |status=Deceased |
||
}} |
}} |
||
| − | [[File:WorldMap-IsleofConquest.jpg|thumb|Zone map]] |
||
| + | '''Warlord Gar'dul''' is the former leader of [[Desolation Hold]] in [[Southern Barrens]]. He ignored [[Crawgol]]'s warnings and created [[Desolation Hold]] over a former [[Silithid]] colony. While in charge of region the cataclysm struck, [[Honor's Stand]] was captured and [[Camp Taurajo]] was sacked, both acts being done by the [[Alliance]]. Following this Gar'dul decided to bide his time until he felt the [[Horde]] forces in the area were ready to strike back against the Alliance. |
||
| − | :''An island somewhere off the shores of Northrend. A rock, hardly worth a second look. A test of strength. A chance to prove your might, to crush your enemies, to make a difference, a chance for endless glory and conquest.'' |
||
| + | However Gar'dul would never get his chance to strike back against the Alliance for [[Warlord Bloodhilt]] had come to the region at the best of [[Garrosh Hellscream|Warchief Garrosh Hellscream]]. After combating the Alliance forces under Bloodhilt's orders Horde adventures were sent report to Gar'dul and tell him that Bloodhilt was coming to Desolation Hold. Upon hearing this Gar'dul becomes nervous and tries to convince said Horde adventures that he has the situation well in hand. However when reminded about Camp Taurajo, he claims that supplies have become tight, he has a manpower shortage, and tries one last time to prevent Bloodhilt from coming. |
||
| − | ''Will you seize it?''<ref name="IsleConquest">[[image:Blizz.gif]] http://www.worldofwarcraft.com/info/underdev/3p2/isleofconquest.xml</ref> |
||
| + | When told that Bloodhilt is almost there Gar'dul goes even more nervous and convinces the messenger to set up a private meeting between Gar'dul, Bloodhilt, and the messenger in the northern tower in Desolation Hold. When Bloodhilt arrives he and Gar'dul have a short exchange where Gar'dul claims that he has been reinforced the Horde's grip in the Southern Barrens. Bloodhilt correctly points out that it was the player that helped reinforce the Horde's control in the region. Gar'dul points out that the Alliance has gotten reinforcements from the [[Eastern Kingdoms]] and that he has been cut off only to be interrupted by Bloodhilt who relives him of command. In rage Gar'dul refuses and attacks Bloodhilt and the player and yields when beaten. Bloodhilt in raged that he yielded asks him what part of "Victory or Death" did he not understand before throwing him out of the tower window to his death. |
||
| ⚫ | |||
| − | The '''Isle of Conquest''' is a 40-person [[battleground]]. Introduced with [[Patch 3.2.0]], it is available only to characters in the 71-80 level range. |
||
| + | Warlord Bloodhilt then assumes command of Desolation Hold. |
||
| − | === Primary Objectives === |
||
| − | Like [[Alterac Valley]], this battleground can be won either by defeating the opposing general, or through attrition (loss of reinforcements). |
||
| − | + | == Quotes == |
|
| + | :''This is Desolation Hold, <class>. Here we bide our time until we are ready to strike back against the [[Alliance]].'' |
||
| − | There are 5 separate capturable locations, each of which provides a separate benefit to the side that holds it. Capture of an objective is a simple channeled, interruptable effect. |
||
| + | ===Final Fight=== |
||
| − | [[File:Refinery.jpg|thumb|Refinery]] |
||
| + | :{{text|say|Warlord Gar'dul|Thank you, <name>. I trust you will, ah, defer to my authority on this matter.}} |
||
| − | [[File:Quarry.jpg|thumb|Quarry]] |
||
| + | :{{text|say|Warlord Bloodhilt|So this is where you're hiding Gar'dul.}} |
||
| − | [[File:Docks.jpg|thumb|Docks]] |
||
| + | :{{text|say|Warlord Gar'dul|Hiding? Listen Bloodhilt - I've, ah, reinforced our grip on the Barrens.}} |
||
| − | [[File:Airship Hangar.jpg|thumb|Hangar]] |
||
| + | :{{text|say|Warlord Bloodhilt|You cower behind your walls! If it wasn't for <name> here the Alliance would be marching through Mulgore.}} |
||
| − | [[File:IOC Workshop.jpg|thumb|Workshop]] |
||
| + | :{{text|say|Warlord Gar'dul|But they've, ah, they've gotten reinforcements! From the Eastern Kingdoms. Whereas I've been, ah, cut off -}} |
||
| + | :{{text|say|Warlord Bloodhilt|Your excuses sicken me! Consider yourself relieved from command.}} |
||
| + | :{{text|say|Warlord Gar'dul|Relieved? Over my dead body!}} |
||
| + | :{{text|say|Warlord Bloodhilt|So! You DO have a spine.}} |
||
| + | ''Warlord Gar'dul turns hostile! Defeat him together with Warlord Bloodhilt!'' |
||
| + | :{{text|say|Warlord Gar'dul| Wait, ah - wait! I yield. I yield!}} |
||
| + | :{{text|say|Warlord Bloodhilt|Yield? You ... YIELD?}} |
||
| + | :{{text|say|Warlord Bloodhilt|What part of "Victory or Death" don't you understand?}} |
||
| + | ''Bloodhilt grabs Gar'dul and throws him out of the window!'' |
||
| ⚫ | |||
| − | ;The [[Refinery (Isle of Conquest)|Refinery]]: Located on the northwestern end of the island, this smudge in the Frozen Sea produces enough black gold to run a thousand siege engines. Taking this resource gives 15% siege weapon increase, garners precious reinforcements and a continuous flow of honor to the side that controls it. |
||
| + | *{{questlong|Horde|33|Desolation Hold Inspection}} {{questfinish}} |
||
| − | |||
| + | *{{questlong|Horde|33|Changing of the Gar'dul}} {{queststart}} |
||
| − | ;The [[Quarry]]: This snow-covered assembly, located on the southeastern end of the island, hides untapped supplies that must be harvested. Taking this resource grants 15% siege increase, and a continuous flow of reinforcements and honor to the side that controls it. |
||
| − | |||
| − | ;The [[Docks]]: The western shore's docks will further expand your selection of siege weapons with the devastating new [[Glaive Thrower (Isle of Conquest)|Glaive Thrower]] and the [[Catapult (Isle of Conquest)|Catapult]]. Unleash the destruction of the Glaive Thrower upon the walls of the keep with it's incredible range, or launch your invading party over the walls to assault the keep from within. It's worth noting the the Horde can place Glaive Throwers on a peninsula to the West of the Alliance castle and hit their Western gate out of range of the defending cannons. |
||
| − | |||
| − | ;The [[Hangar]]: This sturdy steel structure stands on the peak of Mt. Conquest overlooking the eastern side of the island, allowing players to board the airship docked there. This devastating weapon of war is capable of raining death upon the heads of your enemies and destroying enemy defenses. Once onboard the airship, players will find it comes equipped with parachutes enabling a strike team to drop into the enemy keep from above. |
||
| − | |||
| − | ;The [[Workshop (Isle of Conquest)|Workshop]]: Situated right between the Alliance base and the Horde base, this siege workshop occupies a strategic hot spot. Seizing it grants the controlling party the ability to utilize an arsenal of siege vehicles perfectly suited to reducing the enemy keep's walls to dust and ashes. |
||
| − | |||
| − | ;Graveyards: There are five graveyards in the Isle of Conquest that are attached to different points of interest on the map: the Horde base, the Alliance base, an oil spill island in the center of the map (attached to the siege workshop), the Airship Hanger, and the Docks. |
||
| − | : Two additional graveyards of last resort, used only when a faction does not have full control of any of the five primary graveyards, can be found on the northeast and southwest corners of the map, for the Horde and Alliance respectively. These two graveyards cannot be captured by the opposing faction. |
||
| − | {{Zone Map|zone=Isle of Conquest|notes= |
||
| − | {{Zone Map Note|34.9|24.8|POI150|Refinery}} |
||
| − | {{Zone Map Note|63.6|82.4|POI16|Quarry}} |
||
| − | {{Zone Map Note|33.5|53.8|POI145|Docks}} |
||
| − | {{Zone Map Note|57.6|51.0|POI140|Hangar}} |
||
| − | {{Zone Map Note|50.2|52.7|POI135|Workshop}} |
||
| − | {{Zone Map Note|46.5|23.9|POI10|Horde Keep}} |
||
| − | {{Zone Map Note|49.5|79.8|POI11|Alliance Keep}} |
||
| − | {{Zone Map Note|50.5|23.0|POI8|Horde graveyard}} |
||
| − | {{Zone Map Note|52.9|80.9|POI8|Alliance graveyard}} |
||
| − | {{Zone Map Note|44.7|52.8|POI8|Workshop graveyard}} |
||
| − | {{Zone Map Note|62.1|51.3|POI8|Hangar graveyard}} |
||
| − | {{Zone Map Note|30.4|60.7|POI8|Docks graveyard}} |
||
| − | {{Zone Map Note|66.7|31.8|POI13|Horde graveyard of last resort}} |
||
| − | {{Zone Map Note|31.7|70.9|POI15|Alliance graveyard of last resort}} |
||
| − | }} |
||
| − | |||
| − | == Activities == |
||
| − | |||
| − | At each location, there are things that can be done to benefit one's side. |
||
| − | |||
| − | === Refinery and Quarry === |
||
| − | These locations simply add a passive bonus to the strength of the siege forces of the side that holds them. Controlling them also supplies that side bonus honor, just for having them. Controlling them is the limit of what can be done there. |
||
| − | |||
| − | === Docks === |
||
| − | As noted above, control of the docks causes Glaive Throwers and Catapults accessible to your side to spawn. |
||
| − | |||
| − | ==== Glaive Throwers ==== |
||
| − | [[Glaive Thrower (Isle of Conquest)|Glaive Throwers]] in Isle of Conquest are largely anti-personnel weapons. They only have a driver's seat. They have two attacks available: a direct (single target) attack that does a fair amount of damage, and a channeled area effect burst. |
||
| − | |||
| − | While their direct attack can be used against individual targets (at range) or against keep gates, it is their area effect attack that provides their signature benefit. Their range combined with their area effect attack make them highly suited to clearing the keep towers of defenders, or for causing havoc among clusters of combatants. Their Like most siege engines, they are much less maneuverable than individual players, and are susceptible to close-in assaults. |
||
| − | |||
| − | There are three achievements involving the use (or destruction) of Glaive Throwers. |
||
| − | |||
| − | ==== Catapults ==== |
||
| − | [[Catapult (Isle of Conquest)|Catapults]] in Isle of Conquest are vastly different from those seen elsewhere, as they have no direct offensive function. Instead, they serve as a means of entry into the enemy keep. |
||
| − | |||
| − | They have two options: First, an ability that allows them to get into position swiftly, greatly increasing the vehicle's speed, and giving it stealth. And second, an ability like the [[Salvaged Demolisher]] in [[Ulduar]], to hurl (in this case) the driver to a point aimed at. This allows entry into the opposing keep without having brought any gates down. |
||
| − | |||
| − | Two achievements directly involve catapults (one for driving, one for destroying), and a further achievement (entry into the keep before gates are open) can be gained using one. |
||
| − | |||
| − | === Workshop === |
||
| − | Like the Docks, the Workshop provides two types of vehicle. It also allows access to Seaforium Bombs. |
||
| − | |||
| − | ==== Demolishers ==== |
||
| − | Soon after capturing the Workshop, four [[Demolisher (Isle of Conquest)|demolishers]] spawn. These siege engines operate much like the perhaps more familiar [[Wintergrasp Demolisher]], in that they have a fireball (fiery boulder) ranged attack, and a 'melee' ram attack. As with that other demolisher, they have room for two passengers, who are protected by the Demolisher and may attack, but have no vehicle-granted abilities. |
||
| − | |||
| − | Both of the Demolisher's attacks do siege damage, with the ram doing about 30% more than the boulder. The hurled boulder, though, has the advantages of range, and does damage in a 10 yard radius. It is highly suited to most offensive roles, but is most often seen doing siege damage to the enemy keep's gates. |
||
| − | |||
| − | ==== Siege Engines ==== |
||
| − | After holding the workshop for 3 minutes, the [[Siege Engine (Isle of Conquest)|Siege Engine]] will be repaired. (If destroyed, a new one will spawn in 3 more minutes.) The Isle of Conquest Siege Engine has the most active positions of any current World of Warcraft siege vehicle: |
||
| − | |||
| − | :; Driver |
||
| − | :: Controls navigation. Controls the Ram (like the Demolisher, but 30% stronger), and can activate Steam Rush (similar to the Ulduar [[Salvaged Siege Engine]]). |
||
| − | |||
| − | :; Main turret gunner |
||
| − | :: Controls the main cannon, which deals a lot of siege damage, but only about the same amount of damage to players. |
||
| − | :: Can also activate a Steam Blast (a point-blank Area of Effect attack), both knocking them back and doing a good amount of damage, but at the cost of the turret's [[Steam Power]] generation. |
||
| − | |||
| − | :; Two side turret gunners |
||
| − | :: Controls that side's turret, allowing both a cone attack (Flame Turret) and a ranged attack (Napalm). |
||
| − | |||
| − | The siege engine can do massive siege damage if it can get into range of the target. However, it can also be overwhelmed if swarmed by defenders, particularly those able to deal damage at range. It may excel at defense, though, with numerous AoE attacks and no pesky tower guns striking it. |
||
| − | |||
| − | ==== Seaforium Bombs ==== |
||
| − | [[Seaforium Bombs]] are used exclusively to cause damage to the opposing keep's gates. A player may carry only one at a time. As in [[Strand of the Ancients]], these devices must be placed (a short channeled effect), then defended until they detonate (10 seconds later). Enemies may disarm bombs that have been placed, again, by a channeled effect. |
||
| − | |||
| − | Once placed, the bomb disappears from inventory and a new one must be acquired. The bomb is also dropped upon death. |
||
| − | |||
| − | Three achievements involve bombs in this battleground. The Seaforium Bombs and the [[Huge Seaforium Bombs]] (see below) are considered separately for the respective achievements. |
||
| − | |||
| − | === Hangar === |
||
| − | The hangar is the location of the airships for each side. The airships represent a sizable advantage for the side that has them. Once a side has control of the Hangar, two portals become accessible, allowing members of that faction to teleport to the deck of the airship. The airship is on an automated course, circling the enemy keep and returning to the hangar. The portals operate so long as the hangar is controlled, even if the ship is currently on the far side of the enemy keep. |
||
| − | |||
| − | ==== Airship Cannon ==== |
||
| − | There are several Airship cannons mounted on the airship. These cannons do AoE damage both to players and gates. While the strength of the guns is not great, it does damage comparable to the hurled boulder of the demolishers without the vulnerability of that siege engine. While the airship is not always within range of the enemy keep, there are usually enough targets available to keep the operator busy. |
||
| − | |||
| − | ==== Paratroops ==== |
||
| − | All people on the airship are granted the parachute ability. The parachute deploys once you leap off the airship, and lasts until you land ... on something. With only modest amounts of practice, one can parachute into the opposing keep's courtyard without waiting for the gates to fall. |
||
| − | |||
| − | You are also able to cast and attack players as you are falling down. |
||
| − | |||
| − | === The Keeps === |
||
| − | The [[Horde Keep|Horde]] and [[Alliance Keep|Alliance keeps]] sit at opposite ends of the island. You are, yes, playing for Keeps. Your own, your enemy's. Your keep is where your general is. |
||
| − | |||
| − | ==== Keep gates ==== |
||
| − | Each of the keeps has three gates. The defenders have portals at each gate allowing travel to the other side. The attackers must do siege damage to destroy these gates in order to gain admission to the keep. (Other means exist: The airship, and the catapults.) |
||
| − | |||
| − | ==== Keep tower guns ==== |
||
| − | Each keep has two towers, one on either forward corner of the keep. Each tower has three easily accessible guns. |
||
| − | |||
| − | Each tower gun has two powers: Rocket Blast, which deals a hefty whack to everything within 8 yards of the target location. And Incendiary Rocket, which has a smaller area, but deals damage over a period of 15 seconds with a 30 second cooldown. |
||
| − | |||
| − | Keep tower guns are useful against both attacking siege engines and attacking players. They are, though, subject to attack themselves. When destroyed, players can repair them through a fairly short channeled effort. Note that enterprising players may land on the keep towers and attack the guns directly, much to the distress of the gunners. |
||
| − | |||
| − | ==== Control of the keep ==== |
||
| − | A flag towards the back of the keep courtyard signals access to the keep's general. Capture of this flag is handled like that for the other objectives. |
||
| − | |||
| − | |||
| − | ==== Huge Seaforium Bombs ==== |
||
| − | Much like the Seaforium Bombs from the Workshop, ... but larger, and closer to the gates. Like those other bombs, they can be planted, and will do siege damage to the gate unless they are disarmed. You use them against your enemy's gates from the inside, or disarm the ones the enemy tries using against you. |
||
| − | |||
| − | ==== Generals ==== |
||
| − | ... |
||
| − | |||
| − | == Politics == |
||
| − | |||
| − | :''Welcome to the Isle of Conquest.'' |
||
| − | |||
| − | The '''Isle of Conquest''' is a point of strategic importance for the Alliance and Horde campaigns in Northrend. Serving as an ideal staging ground for operations in [[Icecrown]], each side is determined to secure control of the island. With the [[7th Legion]] and the [[Kor'kron Guard]] locked in deadly combat, both factions have issued a call to arms in hopes of tipping the scales in their favor and defeating the opposing general. |
||
| − | |||
| − | The ongoing struggle between [[Horde]] and [[Alliance]] has turned many once peaceful (and some not-so peaceful) places into theaters of constant war. The Isle of Conquest is the latest such place, set to be the location of a battle of epic proportions over the island's precious resources. |
||
| − | |||
| − | An [[Halford Wyrmbane (tactics)|Alliance]] and a [[Overlord Agmar (tactics)|Horde General]] are fighting for dominance, overseeing the action from the safety of their keeps. Whichever side manages to eliminate the enemy general first will triumph on the island; failure to protect your leader will bring shame, dishonor, and defeat. There is no peace accord here, and it's an all-out war between the factions. |
||
| − | |||
| − | The Isle's specific location is of Northwest of Sholazar Basin and West of Onslaught Harbour, you can see both barely with your view distance maxed out on the respective sides of the island.<ref name="IsleConquest"></ref> |
||
| − | |||
| − | |||
| − | ==Achievements== |
||
| − | {{:Player vs. Player achievements/Isle of Conquest}} |
||
| − | |||
| − | ==Videos== |
||
| − | <videogallery> |
||
| − | Video:Gameplay Isle of Conquest |
||
| − | Video:Isle of Conquest - World of Warcraft PTR 3.2 First Look (HD) (PART 1) |
||
| − | Video:Isle of Conquest - World of Warcraft PTR 3.2 First Look (HD) (PART 2) |
||
| − | Video:Isle of Conquest - World of Warcraft PTR 3.2 No Man's Land Exploration (HD) (PART 3) |
||
| − | </videogallery> |
||
== Patch changes == |
== Patch changes == |
||
| ⚫ | |||
| − | * {{patched|date=2009-08-08|bluenote=Players on vehicles, when the Isle of Conquest battleground ends, will now properly receive the appropriate number of Isle of Conquest Marks of Honor.|link=http://blue.mmo-champion.com/23/19110152523-recent-ingame-fixes--august-2009.html}} |
||
| − | * {{patched|date=2009-08-06|bluenote=The Generals in Isle of Conquest now do less damage.|link=http://blue.mmo-champion.com/23/19110152523-recent-ingame-fixes--august-2009.html}} |
||
| ⚫ | |||
| − | |||
| − | == References == |
||
| − | {{reflist}} |
||
== External links == |
== External links == |
||
| − | <!-- Read http://www. |
+ | <!-- Read http://www.wowpedia.org/Wowpedia:External_links before posting your links here. |
Links that do not conform to the rules will be DELETED. |
Links that do not conform to the rules will be DELETED. |
||
Repeat violations may result in a BAN. |
Repeat violations may result in a BAN. |
||
Have a nice day. :) --> |
Have a nice day. :) --> |
||
| − | {{Elinks- |
+ | {{Elinks-NPC|37811}} |
| + | |||
| − | * {{elink|site=Under Development|icon=blizzard|desc=''The Future of Battlegrounds - Q&A'', an interview with [[Cory Stockton]], the Lead Content Designer|link=http://www.worldofwarcraft.com/info/underdev/battleground-qna.html}} |
||
| + | {{Succession|None|'''Leader of [[Desolation Hold]] '''|[[Warlord Bloodhilt]]}} |
||
| − | * {{elink|link=http://blue.mmo-champion.com/1/10222324845-qa-crusaders-coliseum-and-isle-of-conquest.html|site=MMO-Champion BlueTracker|icon=wowbluetracker|desc=Q&A: Crusaders' Coliseum and Isle of Conquest, archived from the official EU Forums}} |
||
| + | |||
| + | {{DEFAULTSORT:Gar'dul, Warlord}} |
||
| − | {{Isle of Conquest}} |
||
| + | [[Category:Orcs]] |
||
| − | {{Battlegrounds}} |
||
| − | [[Category: |
+ | [[Category:Quest givers]] |
| − | [[Category: |
+ | [[Category:Southern Barrens NPCs]] |
Revision as of 11:10, 7 May 2011
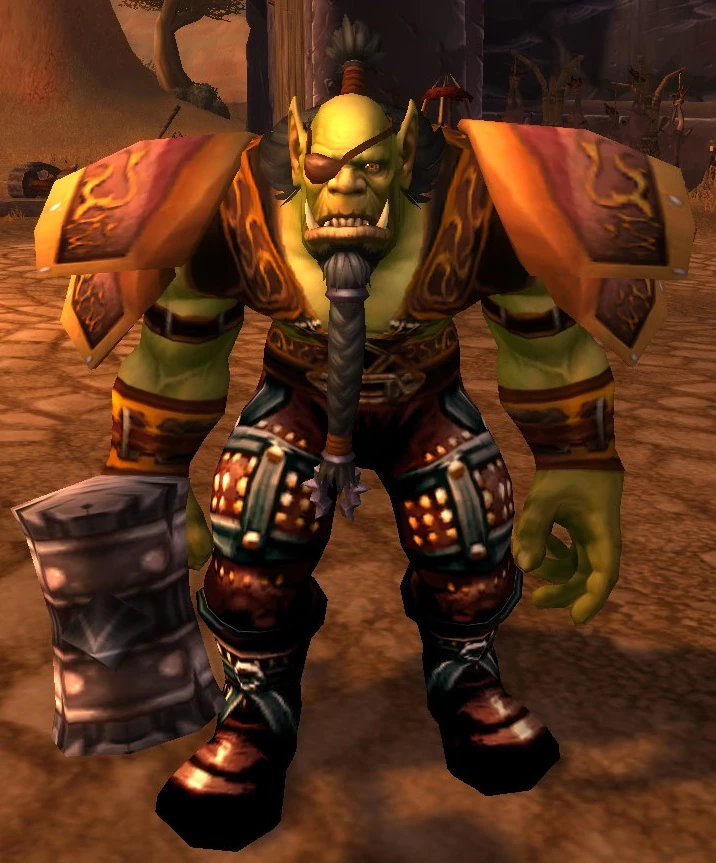 | |
| Race | Orc (Humanoid) |
| Level | 33 Elite |
| Reaction | Alliance Horde |
| Affiliation(s) | Orgrimmar |
| Location | Desolation Hold, Southern Barrens |
| Status | Deceased |
Warlord Gar'dul is the former leader of Desolation Hold in Southern Barrens. He ignored Crawgol's warnings and created Desolation Hold over a former Silithid colony. While in charge of region the cataclysm struck, Honor's Stand was captured and Camp Taurajo was sacked, both acts being done by the Alliance. Following this Gar'dul decided to bide his time until he felt the Horde forces in the area were ready to strike back against the Alliance.
However Gar'dul would never get his chance to strike back against the Alliance for Warlord Bloodhilt had come to the region at the best of Warchief Garrosh Hellscream. After combating the Alliance forces under Bloodhilt's orders Horde adventures were sent report to Gar'dul and tell him that Bloodhilt was coming to Desolation Hold. Upon hearing this Gar'dul becomes nervous and tries to convince said Horde adventures that he has the situation well in hand. However when reminded about Camp Taurajo, he claims that supplies have become tight, he has a manpower shortage, and tries one last time to prevent Bloodhilt from coming.
When told that Bloodhilt is almost there Gar'dul goes even more nervous and convinces the messenger to set up a private meeting between Gar'dul, Bloodhilt, and the messenger in the northern tower in Desolation Hold. When Bloodhilt arrives he and Gar'dul have a short exchange where Gar'dul claims that he has been reinforced the Horde's grip in the Southern Barrens. Bloodhilt correctly points out that it was the player that helped reinforce the Horde's control in the region. Gar'dul points out that the Alliance has gotten reinforcements from the Eastern Kingdoms and that he has been cut off only to be interrupted by Bloodhilt who relives him of command. In rage Gar'dul refuses and attacks Bloodhilt and the player and yields when beaten. Bloodhilt in raged that he yielded asks him what part of "Victory or Death" did he not understand before throwing him out of the tower window to his death.
Warlord Bloodhilt then assumes command of Desolation Hold.
Quotes
- This is Desolation Hold, <class>. Here we bide our time until we are ready to strike back against the Alliance.
Final Fight
- Warlord Gar'dul says: Thank you, <name>. I trust you will, ah, defer to my authority on this matter.
- Warlord Bloodhilt says: So this is where you're hiding Gar'dul.
- Warlord Gar'dul says: Hiding? Listen Bloodhilt - I've, ah, reinforced our grip on the Barrens.
- Warlord Bloodhilt says: You cower behind your walls! If it wasn't for <name> here the Alliance would be marching through Mulgore.
- Warlord Gar'dul says: But they've, ah, they've gotten reinforcements! From the Eastern Kingdoms. Whereas I've been, ah, cut off -
- Warlord Bloodhilt says: Your excuses sicken me! Consider yourself relieved from command.
- Warlord Gar'dul says: Relieved? Over my dead body!
- Warlord Bloodhilt says: So! You DO have a spine.
Warlord Gar'dul turns hostile! Defeat him together with Warlord Bloodhilt!
- Warlord Gar'dul says: Wait, ah - wait! I yield. I yield!
- Warlord Bloodhilt says: Yield? You ... YIELD?
- Warlord Bloodhilt says: What part of "Victory or Death" don't you understand?
Bloodhilt grabs Gar'dul and throws him out of the window!
Quests
Patch changes
 Patch 4.0.3a (2010-11-23): Added.
External links
| Preceded by: None |
Position: Leader of Desolation Hold |
Succeeded by: Warlord Bloodhilt |