Mondoblasto (talk | contribs) mNo edit summary |
|||
| Line 1: | Line 1: | ||
| − | {{ |
+ | {{npcbox |
| + | |gender=Male |
||
| − | | name = Skardyn |
||
| + | |name=Razorgore the Untamed |
||
| − | | |
+ | |image=Razorgore.jpg |
| − | | capital = [[Grim Batol]]{{fact}} |
||
| + | |level=?? |
||
| − | | homeworld = [[Azeroth (world)|Azeroth]] |
||
| + | |type=Boss |
||
| − | | language = [[Dwarven]], unknown |
||
| + | |faction=Combat |
||
| + | |affiliation=[[Black dragonflight]] |
||
| + | |aggro = {{aggro|-1|-1}} |
||
| + | |status=Killable |
||
| + | |location=[[Blackwing Lair]] |
||
| + | |race=Dragonspawn |
||
| + | |creature=Dragonkin |
||
| + | |health=449,685 |
||
| + | |instance=Blackwing Lair |
||
}} |
}} |
||
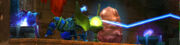
| + | [[File:razorgore death.jpg|thumb|Razorgore unleashes a massive AoE that instantly kills everyone.]] |
||
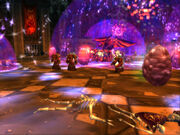
| + | [[File:bwl orb.jpg|thumb|Razorgore is kept under control by a mind-controlling orb.]] |
||
| + | '''Razorgore the Untamed''' is a [[black dragonflight]] [[dragonspawn]] and the first boss of [[Blackwing Lair]]. |
||
| − | '''Skardyn''' are the descendants of [[Dark Iron dwarf|Dark Iron dwarves]] who had survived the end of the [[War of the Three Hammers]] (230 years before the [[First War]]<ref>[[War of the Three Hammers (History of Warcraft)|War of the Three Hammers]]</ref>), and then fled into [[Grim Batol]].<ref name="NotD15">''[[Night of the Dragon]]'', pg. 15</ref> They were transformed by the evil inside Grim Batol, ironically caused by the curse of their ancestors' [[sorceress]] Dark Iron queen, [[Modgud]].<ref name="NotD15" /> |
||
| + | ==Overview== |
||
| − | More animal than sentient being but not without cunning,<ref name="NotD125">''[[Night of the Dragon]]'', pg. 125</ref> they are described as being close in shape to a [[dwarf]], but with clawed, paw-like hands, covered in black, coarse, scales on their bodies (even where there should be a beard), and a double-forked tongue. Their bodies are slightly shorter than the average dwarf, but have slightly extra width made up of muscle, from digging through earth with their bare hands.<ref name="NotD15-16">''[[Night of the Dragon]]'', pg. 15-16</ref> Their hands allow them to run as quadrupeds, and even scale cave walls and ceilings like spiders.<ref>''[[Night of the Dragon]]'', pg. 237</ref> Despite their stocky shape, they can move with far more swiftness then one would assume.<ref name="NotD125" /> Even when disarmed, they can fight with tooth and claw.<ref name="NotD15-16" /> A mouth full of sharp, reptilian teeth is used to devour any kind of meat they come across, no matter what state it's in; this causes them to have foul breath and a bite that can make a victim ill.<ref name="NotD131">''[[Night of the Dragon]]'', pg. 131</ref> Their eyes are red, much like modern Dark Irons, described as molten earth, blood red, and crimson.<ref name="NotD2">''[[Night of the Dragon]]'', pg. 2</ref><ref name="NotD16"/><ref name="NotD17"/> They tend to hiss, will howl when hunting, and their laugh sounds like someone choking on something.<ref name="NotD17"/><ref>''[[Night of the Dragon]]'', pg. 125, 19</ref> The skardyn will use their sense of smell to examine their surroundings, such as the earth, air and what life there is around them when hunting (and presumably tracking).<ref name="NotD125" /> While there are male and female skardyn, even dwarves cannot tell the difference between the two genders.<ref>''[[Night of the Dragon]]'', pg. 240</ref> |
||
| + | The very first thing you will see when you enter [[Blackwing Lair]] is the [[Egg Chamber]]. To progress beyond this room, you must first defeat '''Razorgore'''. |
||
| + | The raid should be well equipped with [[Molten Core|MC]] gear at least. The main damage from Razorgore is fire damage, thus the tanks should balance their gear well - they do need some FR (but not all-out FR gear, because this impairs their ability to kite). Other raid members can also benefit from FR gear (esp. those dealing with the mages), but nobody should gimp himself too much just for FR. |
||
| − | The skardyn tend to wear ragged, brown hooded garments with armor, and use belts.<ref name="NotD15"/><ref name="NotD2"/> They still use the markings of the Dark Iron clan on their garments, which decisively identified their origins.<ref name="NotD16">''[[Night of the Dragon]]'', pg. 16</ref> In terms of weapons, they have [[dagger]]s on their belts, use [[axe]]s with the same style from the War of the Three Hammers, and palm-sized, spiked balls made of metal, which are either tossed by hand or thrown using slings.<ref name="NotD15-16" /> They also favor [[pike]]s and whips along with the axes.<ref>''[[Night of the Dragon]]'', pg. 128</ref> As the War occurred a few decades before the dwarven discovery of gunpowder,<ref>[[War of the Three Hammers (History of Warcraft)|War of the Three Hammers]]</ref><ref>''[[Alliance Player's Guide]]'', 145</ref> the skardyn also use the ''dwyar'hun'' (literally "star bow" from the older dwarven dialect), a long-range weapon akin to a tiny [[crossbow]]. It fires a tiny spiked ball carved from stone, with the spikes being at least two inches long (the "star" of the bow). So long ago that the weapon has been abandoned, modern dwarves would not recognize it unless having seen or read about it in the historical records.<ref name="NotD237">''[[Night of the Dragon]]'', pg. 237-238</ref> |
||
| + | This encounter consists of three phases: |
||
| − | Skardyn have carried down the love of the pipe from their ancestors. Instead of the carved wooden pipes of the dwarves, they use curled pipes crafted from clay. What they fill them with is a mystery, as the only known substance that dead skardyn have been found with for smoking smells like old grass and mulched earth worms, something even the hardiest of dwarves would rather not experiment with.<ref>''[[Night of the Dragon]]'', pg. 16-17</ref> They also at least know of the ritual of ''Gwyarbrawden'' and the legends tied to it; whether they practice it is unknown.<ref name="NotD17">''[[Night of the Dragon]]'', pg. 17</ref> The skardyn speak an unknown language or dialect, but will sometimes speak [[Dwarven]] (even if it is spoken in a manner more like [[Low Common]]).<ref name="NotD16"/><ref>''[[Night of the Dragon]]'', pg. 187</ref> They consider dwarves from the [[Bronzebeard clan]] good eating.<ref name="NotD125" /> |
||
| + | During Phase 1 the orcish orb controller, [[Grethok the Controller]], and his two guards are dealt with. On the pull a timer starts, at the end of which adds will start to spawn (phase 2). If the controller and his guards are dead before the timer expires, the raid will have a short phase out of combat at the end of phase 1. The [[Orb of Domination]] should be used right away to control Razorgore, else he will attack the raid. The controlled Razorgore is used to destroy all the eggs in the room. |
||
| + | In Phase 2, adds spawn in the rooms corners until 40 orcs (melee and mage types combined) and 12 dragonkin are there. If some adds are killed, new ones will spawn to replace them. This phase ends when all the eggs in the room are destroyed, at that point all adds despawn and Razorgore is reset to full health. If Razorgore reaches 0 hp before all of the eggs are destroyed, he will unleash a massive AoE that instantly kills the entire raid, and resets the room. |
||
| − | == Cataclysm == |
||
| − | {{Cata-section}} |
||
| − | The Skardryn makes an appearance in Cataclysm, as one of the mobs there. In the beta, they currently use the model of [[trogg]]s. |
||
| + | The objective of Phase 3 is to kill Razorgore. Hopefully enough of the raid survived phase 2 to bring him down... |
||
| − | == References == |
||
| − | {{reflist}} |
||
| + | ==Phase 1== |
||
| − | [[es:Skardyn]] |
||
| + | This is a quick and dirty fight. Aggroing this mob also aggroes Razorgore, so this phase needs to be completed as quickly as possible. The controller has a mind control ability, so kill him first. CCing his guards is not a good idea because it takes too much time; better tank them, some raids even use AoE. The faster these three are dead the better. When this is done, have someone take control of the controlling orb. |
||
| ⚫ | |||
| + | |||
| ⚫ | |||
| + | ==Phase 2== |
||
| − | [[Category:World of Warcraft: Night of the Dragon]] |
||
| + | The following general strategy works best for raids while learning this encounter. There are variations possible (like using fear, or Razorgore's firebolt cluster), but the general idea mostly remains the same. |
||
| + | |||
| + | ===Three types of adds=== |
||
| + | In the room corners are two spawn points each (the little "rooms" which are lower than the normal floor). From these points, up to 52 adds spawn rather quickly, but randomly. The types of adds and how they should be dealt with are: |
||
| + | |||
| + | *Dragonkin should be kited, crowd controlled or feared all the time. They are very hard to kill, and deal high amounts of damage. |
||
| + | *Legionnaires (melee orcs) should be kited (e.g. by a few warriors). They aren't very dangerous, except for their cleave. |
||
| + | *Blackwing Mages (mage orcs) should be killed as fast as possible. They die quick, but can deal nasty damage (ranged and AoE). |
||
| + | |||
| + | All adds have initial aggro on the Razorgore controller. The mage types will run to the center of the room and start to attack the controller with their ranged fireballs - this must not happen. |
||
| + | |||
| + | Since the number of adds is limited (12 dragonkin and 40 orcs), killing only the mages will eventually lead to a room full of melee orcs and dragonkin. |
||
| + | |||
| + | ===Corner groups=== |
||
| + | It's a good idea to set up at least one 5 man group (consisting of rogue, mages and warlocks) to watch each corner and kill the mages spawning there. It helps to set up a rogue as main tank in CTRaidAssist for each of these corner groups. |
||
| + | |||
| + | ===Controlling Razorgore=== |
||
| + | When controlled, Razorgore has the following abilities: |
||
| + | * {{abilities|Destroy Egg|Destroys a nearby egg. |image=inv_misc_monsterclaw_02 |id=19873 |cd=7 sec |range=10 |energy=3 second cast}} |
||
| + | * {{abilities|Calm Dragonkin|Lulls a young dragon asleep for 30 sec. |image=spell_nature_invisibilitytotem |id=19872 |range=60 |energy=instant}} |
||
| + | * {{abilities|Fireball Volley|Inflicts Fire damage to nearby enemies |image=spell_fire_flamebolt |id=22425 | energy=2 sec cast |range=40|notes=does ~1,000 fire damage, gains aggro.}} |
||
| + | |||
| + | It is a good idea to have the MT or at least some "hard" class (warrior, paladin or feral druid) control him, because Razorgore will have an infinite amount of aggro on his former controller in Phase 3. Controlling Razorgore is a channeled effect which regularly wears off after 90 seconds. The "destroy egg" ability has a cooldown of 10 sec, so 9 [[Black Dragon Egg|eggs]] can be destroyed each control period. Beyond this, Razorgore has a fire ball volley, and the ability to sleep dragonkin. |
||
| + | |||
| + | It can help to position Razorgore away from the orb near the end of the control periods, so he cannot immediately attack the controller. Do not double-click the orb. If you do that you will get the mind exhaustion debuff which means that you can't control him and someone else will need to take over. The boss will be loose while this happens and that's bad. If you want to end a control period early, the /dance emote is an appropriate method. |
||
| + | |||
| + | If the sleep dragonkin ability is to be used, a dedicated assist for this purpose should be set up. This person keeps a lookout for loose dragonkin, and targets them. The Razorgore controller can then assist and sleep while waiting for the destroy egg cooldown. There appears to be no cap on the number of dragons he can sleep, so a skilled controller can take as many as four dragonkin out of the fight. |
||
| + | |||
| + | If Razorgore dies before this phase is complete, he will produce a large death explosion which will kill everything in the room. This explosion goes through Divine Shield and Ice Block and is not prevented by Ardent Defender. |
||
| + | |||
| + | ===Healing=== |
||
| + | All healing classes should be used to heal because healing aggro is the reason for most wipes here. Since it is impossible to establish solid aggro on 52 mobs, healers must be extremely cautious. In order to distribute healing aggro as much as possible, use shield all the time, and ranked-down heals (and healing stream totems if available), and take care to heal as many different targets as possible. Wipes usually happen because some healer draws healing aggro and gets killed, then the other healers have to heal more, and get aggro in turn. Alternatively, the wipe happens when a kiter dies (because he didn't get healed enough), and his train then turns on the healers. |
||
| + | |||
| + | Avoid the use of HoTs; they produce more aggro than a direct heal. Power Word: Shield though *does* create only about 60% of the aggro of an equivalent heal, thus priests should pay attention that all kiters are shielded as much as possible. |
||
| + | |||
| + | ===Kiting=== |
||
| + | When kiting the adds, it is important to gain a speed advantage over them. Hunters have their speed increase buff, while warriors have an AoE slowdown debuff. Dragonkin are immune to the latter, they also ignore the effect of stoneclaw totem. Thus if warriors kite dragonkin, they should use the platforms and stairs to gain a speed advantage. The trick is to jump off the platforms, because the mobs will not jump, but instead run down the nearest ramp. The kiter should then run across the room up the opposite ramp, wait on the platform, and jump off when the chase is within 5-10 yards. The pause is important because if they run too fast, the mobs will not run up the platform but instead take the shortcut. Next run back to first ramp, run up, and repeat - this leads to a "figure 8" pattern. During this whole time the kiter should be spamming demoralizing shout (or use scatter shot) to hold aggro. If done properly, the kiters take only little damage during this. Boots enchanted with the +speed enchant help a lot. |
||
| + | |||
| + | If one kiter has both mob types (dragonkin and legionnaires) in his train, slowdown effects are not a good idea, because the Dragonkin are immune, while the orcs are not, resulting in a splitting train. |
||
| + | |||
| + | ===Kiting with Razorgore=== |
||
| + | It is possible to kite Razorgore. With his fireball volley, he can easily hold aggro on the whole room. The problem is to keep him alive, esp. the melee orcs do quadruple damage on dragons. The raid must concentrate on freezing, fearing and sleeping most of the mobs, while the healers keep Razorgore up. |
||
| + | |||
| + | If Razor takes too much damage, release control. In that case, the aggro is transferred from Razor to his former controller, who now can start to kite the whole room (while somebody else takes control and continues to destroy the eggs). Pay attention not to break the train in this case (avoid using fear, and don't heal). |
||
| + | |||
| + | ===Finer points=== |
||
| + | *The mages in the corner groups can sheep the legionnaires (to make them harmless until a kiter adds them to his train). |
||
| + | *Similarly, druids can sleep the Dragonkin, until they are added to some train. Unfortunately this increases aggro from the Dragonkin they slept, reducing the amount of healing the druids can do. |
||
| + | *Fear should be used only sparingly until nearly all eggs are destroyed (because it breaks trains) |
||
| + | *Combat rezzes by druids (and shaman ankhs) should be saved until it is certain that phase 3 will be reached |
||
| + | *In order to get down the mages fast, a targeting macro ("/target blackwing mage") can help (for corner group members) |
||
| + | *Turning on the mob nameplates (V, shift-V, or ctrl-V) can help to reduce the general confusion |
||
| + | *If the mages are silenced, they run into melee range, and use their deadly AoE as soon as the silence wears off. For this reason it's a good idea not to silence/counterspell/earthshock/whatever them. |
||
| + | *If hunters kite dragonkin and warriors kite legionnaires, there is the danger that the orcs cleave the hunters if a hunter has to cross the path of an orc train. Therefore in this scenario, hunters and warriors should try to find paths which don't cross. |
||
| + | *Have a warlock or two on the controllers platform to fear all loose adds that get up there. |
||
| + | *Keep a shield on the controller the whole time, being hit reduces the control time. |
||
| + | *Give raid icons to the kiters, this makes it easier for the healers to identify whom they should heal |
||
| + | |||
| + | ==Phase 3== |
||
| + | Razorgore alone isn't very strong and it is possible to win with two surviving tanks, 4 healers, and a few DPS, though it is obviously preferable to have more. The only difficulty is to manage his aggro, like all dragons he's immune to taunt. Fortunately his former controller is fixed on the top of his aggro list (until the former controller dies). |
||
| + | |||
| + | Razorgore has a [http://www.wowhead.com/spell=23023 Conflagration] spell which he sometimes uses against his current target, which disorients the target for some time. While that confusion lasts, Razorgore attacks the next highest target on his hate list. After the effect wears off, he returns to his normal hate list mechanics, so if the confused person was the former controller, Razorgore will always return to him. |
||
| + | |||
| + | The usual method to deal with this is to have at least two tanks, positioned far enough apart not to be hit by the conflagration at the same time. |
||
| + | |||
| + | Since the conflagration is an AoE effect, the main damage should be ranged (similarly to the [[Onyxian Warder]] encounters). Rogues should bandage the range DPSers at this time, as well as help with their bows. |
||
| + | |||
| + | ==Quotes== |
||
| + | ;Destroy Egg |
||
| + | *{{text|yell|No, not another one! I'll have your heads for this atrocity!}} |
||
| + | *{{text|yell|Fools! These eggs are more precious than you know!}} |
||
| + | *{{text|yell|You'll pay for forcing me to do this!}} |
||
| + | |||
| + | ;Death (before all of the eggs have been destroyed) |
||
| + | *{{text|yell|If I fall into the abyss, I'll take all of you mortals with me!}} |
||
| + | |||
| + | ;Arcane Explosion |
||
| + | *{{text|yell|I'm free! That device shall never torment me again!}} |
||
| + | |||
| + | ==Loot== |
||
| + | {{lootbox|[[Tier 2]] wrist|Bindings of Transcendence|Bloodfang Bracers|Bracelets of Wrath|Bracers of Ten Storms|Dragonstalker's Bracers|Judgement Bindings|Nemesis Bracers|Netherwind Bindings|Stormrage Bracers}} |
||
| + | |||
| + | {{lootbox|Razorgore non-set loot|Arcane Infused Gem|Gloves of Rapid Evolution|Mantle of the Blackwing Cabal|Spineshatter|The Black Book|The Untamed Blade}} |
||
| + | |||
| + | == Videos == |
||
| + | {| class="darktable" style="text-align:center;" |
||
| + | |- |
||
| + | ! Razorgore from a Hunter's Perspective |
||
| + | |- |
||
| + | | <youtube>ymMOB6DxIP8</youtube> |
||
| + | |} |
||
| + | |||
| + | == Bugs and other known effects == |
||
| + | *The adds may continue to spawn after the defeat of Razorgore. Whether this is due to a minimum number of adds not having been reached or other causes is unknown. Typical reactions are for the raid to exit the instance and re-enter. There may be adds up that must be killed at that point, but further adds may be suppressed. |
||
| + | *If the Mind Control effect on Razorgore drops when he is not in combat, he will do his arcane explosion, wiping the raid. |
||
| + | |||
| + | ==Patches and hotfixes== |
||
| + | * {{patched|date=2009-08-05|bluenote=Razorgore can once again be controlled multiple times and defeated appropriately.|link=http://blue.mmo-champion.com/23/19110152523-recent-ingame-fixes--august-2009.html}} |
||
| + | * {{Patch 1.8.0|note=Razorgore now has the ability to summon players to him if he cannot reach them for a time.}} |
||
| + | * {{Patch 1.6.1|note=The Razorgore encounter has been changed slightly to make it less "random". The spawning should be more consistent throughout the fight.}} |
||
| + | * {{Patch 1.6.0|note=Added}} |
||
| + | |||
| + | ==External links== |
||
| + | <!-- Read http://www.wowwiki.com/WoWWiki:External_links before posting your links here. |
||
| + | Links that do not conform to the rules will be DELETED. |
||
| + | Repeat violations may result in a BAN. |
||
| + | Have a nice day. :) --> |
||
| + | {{elinks-NPC|12435|armory=1}} |
||
| + | |||
| + | {{Black Dragonflight}} |
||
| ⚫ | |||
| ⚫ | |||
| + | [[Category:Blackwing Lair mobs]] |
||
Revision as of 20:13, 3 October 2010
 | |||||||||||
| Gender | Male | ||||||||||
| Race | Dragonspawn (Dragonkin) | ||||||||||
| Level | ?? Boss | ||||||||||
| Reaction | Alliance Horde | ||||||||||
| Affiliation(s) | Black dragonflight | ||||||||||
| Location | Blackwing Lair | ||||||||||
| Status | Killable | ||||||||||
| |||||||||||

Razorgore unleashes a massive AoE that instantly kills everyone.

Razorgore is kept under control by a mind-controlling orb.
Razorgore the Untamed is a black dragonflight dragonspawn and the first boss of Blackwing Lair.
Overview
The very first thing you will see when you enter Blackwing Lair is the Egg Chamber. To progress beyond this room, you must first defeat Razorgore.
The raid should be well equipped with MC gear at least. The main damage from Razorgore is fire damage, thus the tanks should balance their gear well - they do need some FR (but not all-out FR gear, because this impairs their ability to kite). Other raid members can also benefit from FR gear (esp. those dealing with the mages), but nobody should gimp himself too much just for FR.
This encounter consists of three phases: During Phase 1 the orcish orb controller, Grethok the Controller, and his two guards are dealt with. On the pull a timer starts, at the end of which adds will start to spawn (phase 2). If the controller and his guards are dead before the timer expires, the raid will have a short phase out of combat at the end of phase 1. The Orb of Domination should be used right away to control Razorgore, else he will attack the raid. The controlled Razorgore is used to destroy all the eggs in the room.
In Phase 2, adds spawn in the rooms corners until 40 orcs (melee and mage types combined) and 12 dragonkin are there. If some adds are killed, new ones will spawn to replace them. This phase ends when all the eggs in the room are destroyed, at that point all adds despawn and Razorgore is reset to full health. If Razorgore reaches 0 hp before all of the eggs are destroyed, he will unleash a massive AoE that instantly kills the entire raid, and resets the room.
The objective of Phase 3 is to kill Razorgore. Hopefully enough of the raid survived phase 2 to bring him down...
Phase 1
This is a quick and dirty fight. Aggroing this mob also aggroes Razorgore, so this phase needs to be completed as quickly as possible. The controller has a mind control ability, so kill him first. CCing his guards is not a good idea because it takes too much time; better tank them, some raids even use AoE. The faster these three are dead the better. When this is done, have someone take control of the controlling orb.
Phase 2
The following general strategy works best for raids while learning this encounter. There are variations possible (like using fear, or Razorgore's firebolt cluster), but the general idea mostly remains the same.
Three types of adds
In the room corners are two spawn points each (the little "rooms" which are lower than the normal floor). From these points, up to 52 adds spawn rather quickly, but randomly. The types of adds and how they should be dealt with are:
- Dragonkin should be kited, crowd controlled or feared all the time. They are very hard to kill, and deal high amounts of damage.
- Legionnaires (melee orcs) should be kited (e.g. by a few warriors). They aren't very dangerous, except for their cleave.
- Blackwing Mages (mage orcs) should be killed as fast as possible. They die quick, but can deal nasty damage (ranged and AoE).
All adds have initial aggro on the Razorgore controller. The mage types will run to the center of the room and start to attack the controller with their ranged fireballs - this must not happen.
Since the number of adds is limited (12 dragonkin and 40 orcs), killing only the mages will eventually lead to a room full of melee orcs and dragonkin.
Corner groups
It's a good idea to set up at least one 5 man group (consisting of rogue, mages and warlocks) to watch each corner and kill the mages spawning there. It helps to set up a rogue as main tank in CTRaidAssist for each of these corner groups.
Controlling Razorgore
When controlled, Razorgore has the following abilities:
 Destroy Egg (3 second cast) 10 yd range — Destroys a nearby egg. (7 sec cooldown)
- Calm Dragonkin (instant) 60 yd range — Lulls a young dragon asleep for 30 sec.
- Fireball Volley (2 sec cast) 40 yd range — Inflicts Fire damage to nearby enemies does ~1,000 fire damage, gains aggro.
It is a good idea to have the MT or at least some "hard" class (warrior, paladin or feral druid) control him, because Razorgore will have an infinite amount of aggro on his former controller in Phase 3. Controlling Razorgore is a channeled effect which regularly wears off after 90 seconds. The "destroy egg" ability has a cooldown of 10 sec, so 9 eggs can be destroyed each control period. Beyond this, Razorgore has a fire ball volley, and the ability to sleep dragonkin.
It can help to position Razorgore away from the orb near the end of the control periods, so he cannot immediately attack the controller. Do not double-click the orb. If you do that you will get the mind exhaustion debuff which means that you can't control him and someone else will need to take over. The boss will be loose while this happens and that's bad. If you want to end a control period early, the /dance emote is an appropriate method.
If the sleep dragonkin ability is to be used, a dedicated assist for this purpose should be set up. This person keeps a lookout for loose dragonkin, and targets them. The Razorgore controller can then assist and sleep while waiting for the destroy egg cooldown. There appears to be no cap on the number of dragons he can sleep, so a skilled controller can take as many as four dragonkin out of the fight.
If Razorgore dies before this phase is complete, he will produce a large death explosion which will kill everything in the room. This explosion goes through Divine Shield and Ice Block and is not prevented by Ardent Defender.
Healing
All healing classes should be used to heal because healing aggro is the reason for most wipes here. Since it is impossible to establish solid aggro on 52 mobs, healers must be extremely cautious. In order to distribute healing aggro as much as possible, use shield all the time, and ranked-down heals (and healing stream totems if available), and take care to heal as many different targets as possible. Wipes usually happen because some healer draws healing aggro and gets killed, then the other healers have to heal more, and get aggro in turn. Alternatively, the wipe happens when a kiter dies (because he didn't get healed enough), and his train then turns on the healers.
Avoid the use of HoTs; they produce more aggro than a direct heal. Power Word: Shield though *does* create only about 60% of the aggro of an equivalent heal, thus priests should pay attention that all kiters are shielded as much as possible.
Kiting
When kiting the adds, it is important to gain a speed advantage over them. Hunters have their speed increase buff, while warriors have an AoE slowdown debuff. Dragonkin are immune to the latter, they also ignore the effect of stoneclaw totem. Thus if warriors kite dragonkin, they should use the platforms and stairs to gain a speed advantage. The trick is to jump off the platforms, because the mobs will not jump, but instead run down the nearest ramp. The kiter should then run across the room up the opposite ramp, wait on the platform, and jump off when the chase is within 5-10 yards. The pause is important because if they run too fast, the mobs will not run up the platform but instead take the shortcut. Next run back to first ramp, run up, and repeat - this leads to a "figure 8" pattern. During this whole time the kiter should be spamming demoralizing shout (or use scatter shot) to hold aggro. If done properly, the kiters take only little damage during this. Boots enchanted with the +speed enchant help a lot.
If one kiter has both mob types (dragonkin and legionnaires) in his train, slowdown effects are not a good idea, because the Dragonkin are immune, while the orcs are not, resulting in a splitting train.
Kiting with Razorgore
It is possible to kite Razorgore. With his fireball volley, he can easily hold aggro on the whole room. The problem is to keep him alive, esp. the melee orcs do quadruple damage on dragons. The raid must concentrate on freezing, fearing and sleeping most of the mobs, while the healers keep Razorgore up.
If Razor takes too much damage, release control. In that case, the aggro is transferred from Razor to his former controller, who now can start to kite the whole room (while somebody else takes control and continues to destroy the eggs). Pay attention not to break the train in this case (avoid using fear, and don't heal).
Finer points
- The mages in the corner groups can sheep the legionnaires (to make them harmless until a kiter adds them to his train).
- Similarly, druids can sleep the Dragonkin, until they are added to some train. Unfortunately this increases aggro from the Dragonkin they slept, reducing the amount of healing the druids can do.
- Fear should be used only sparingly until nearly all eggs are destroyed (because it breaks trains)
- Combat rezzes by druids (and shaman ankhs) should be saved until it is certain that phase 3 will be reached
- In order to get down the mages fast, a targeting macro ("/target blackwing mage") can help (for corner group members)
- Turning on the mob nameplates (V, shift-V, or ctrl-V) can help to reduce the general confusion
- If the mages are silenced, they run into melee range, and use their deadly AoE as soon as the silence wears off. For this reason it's a good idea not to silence/counterspell/earthshock/whatever them.
- If hunters kite dragonkin and warriors kite legionnaires, there is the danger that the orcs cleave the hunters if a hunter has to cross the path of an orc train. Therefore in this scenario, hunters and warriors should try to find paths which don't cross.
- Have a warlock or two on the controllers platform to fear all loose adds that get up there.
- Keep a shield on the controller the whole time, being hit reduces the control time.
- Give raid icons to the kiters, this makes it easier for the healers to identify whom they should heal
Phase 3
Razorgore alone isn't very strong and it is possible to win with two surviving tanks, 4 healers, and a few DPS, though it is obviously preferable to have more. The only difficulty is to manage his aggro, like all dragons he's immune to taunt. Fortunately his former controller is fixed on the top of his aggro list (until the former controller dies).
Razorgore has a Conflagration spell which he sometimes uses against his current target, which disorients the target for some time. While that confusion lasts, Razorgore attacks the next highest target on his hate list. After the effect wears off, he returns to his normal hate list mechanics, so if the confused person was the former controller, Razorgore will always return to him.
The usual method to deal with this is to have at least two tanks, positioned far enough apart not to be hit by the conflagration at the same time.
Since the conflagration is an AoE effect, the main damage should be ranged (similarly to the Onyxian Warder encounters). Rogues should bandage the range DPSers at this time, as well as help with their bows.
Quotes
- Destroy Egg
- No, not another one! I'll have your heads for this atrocity!
- Fools! These eggs are more precious than you know!
- You'll pay for forcing me to do this!
- Death (before all of the eggs have been destroyed)
- If I fall into the abyss, I'll take all of you mortals with me!
- Arcane Explosion
- I'm free! That device shall never torment me again!
Loot
|
|
Videos
| Razorgore from a Hunter's Perspective |
|---|
Bugs and other known effects
- The adds may continue to spawn after the defeat of Razorgore. Whether this is due to a minimum number of adds not having been reached or other causes is unknown. Typical reactions are for the raid to exit the instance and re-enter. There may be adds up that must be killed at that point, but further adds may be suppressed.
- If the Mind Control effect on Razorgore drops when he is not in combat, he will do his arcane explosion, wiping the raid.
Patches and hotfixes
- Template:Patched
- Patch 1.8.0 (2005-10-10): Razorgore now has the ability to summon players to him if he cannot reach them for a time.
- Patch 1.6.1 (2005-08-02): The Razorgore encounter has been changed slightly to make it less "random". The spawning should be more consistent throughout the fight.
- Patch 1.6.0 (2005-07-12): Added
External links
| Leader | |
|---|---|
| Characters | |
| Territories | |
| Types | |
| Groups and cults |