Pyroclastic45873@legacy41565482 (talk | contribs) |
Renemauricio (talk | contribs) |
||
| Line 1: | Line 1: | ||
| + | {{for|her character biography|Sintharia}} |
||
| − | {{Infobox ability |
||
| + | {{npcbox |
||
| − | |name=Slow |
||
| − | |image= |
+ | |image = Sinestra.jpg |
| + | |name = Sinestra |
||
| − | |description=Reduces target's movement speed by 60%, increases the time between ranged attacks by 60% and increases casting time by 30%. Lasts 15 sec. Slow can only affect one target at a time. |
||
| + | |title = Consort of Deathwing |
||
| − | |class=[[Mage]] |
||
| + | |gender = Female |
||
| − | |type=Offensive |
||
| + | |race = Black wyrm |
||
| − | |school=[[Arcane]] |
||
| + | |creature = Dragonkin |
||
| − | |target="Self" |
||
| + | |level = ?? |
||
| − | |cost=12% base [[Mana]] |
||
| + | |type = Boss |
||
| − | |range=30 yds. |
||
| + | |faction = Combat |
||
| − | |cast_time=Instant |
||
| + | |location = [[Twilight Caverns]], [[Bastion of Twilight]] |
||
| − | |talented=Yes |
||
| + | |aggro = {{aggro|-1|-1}} |
||
| − | |talent_tree=Arcane, Tier 9 |
||
| + | |health = 128,838,000 (25)<br/>42,950,000 (10) |
||
| − | |improvement=[[Arcane Subtlety]], [[Arcane Focus]] |
||
| − | | |
+ | |mana = |
| + | |instance=Bastion of Twilight |
||
| − | |requirements=Only one target can be affected at a time. |
||
| − | |buff_name=Slow |
||
| − | |buff_type=magic |
||
| − | |buff_image=Spell_Nature_Slow.png |
||
| − | |buff_desc=Movement speed reduced by 60%. Time between ranged attacks increased by 60%. Casting time increased by 30%. |
||
| − | |buff_dur=15 seconds |
||
| − | |debuff= |
||
}} |
}} |
||
| + | '''Sinestra''' is a heroic-mode only boss in the [[Bastion of Twilight]], described as similar to [[Algalon the Observer]] in [[Ulduar]]. She is only accessible after [[Cho'gall (tactics)|Cho'gall]] is defeated. |
||
| − | {{AbilityFlavor|"A . . . little . . . help . . . here?"|TCGFoO|45}} |
||
| + | The world first kill was made by [[Paragon]] of [[Lightning's Blade-EU]] on January 20, 2011. |
||
| − | ==Background== |
||
| − | The Mages of Lordaeron have been able to create a spell that hinders both movement and reflex. By warping the very patterns of time that surround his target, Slow enables the caster to bring an enemy's offensive to a crawl. Time cannot be held in check by even the mightiest of Mages, however, so the effects of this temporal shift cease as the power of the spell wanes.{{cite|W2Man|52}} |
||
| + | Originally Deathwing's Prime Consort, Sinestra created the first twilight dragons, but was later obliterated by one of her terrifying creations. Now a ravaged husk reanimated by insidious magic, Sinestra oversees the creation of new twilight clutches. <ref>[[Encounter Journal]]</ref> |
||
| − | ==Overview== |
||
| − | '''Slow''' is a talent-trained [[mage]] spell that slows movement and reduces ranged attack and casting speed for 15 seconds. It is a 60% [[snare]] combined with a 60% negative [[haste]] debuff that affects ranged attacks and a 30% for spell casting. Only one target can be affected by Slow at a time. |
||
| + | ==Attacks and abilities== |
||
| − | {| class="darktable" style="text-align: center;" |
||
| + | *{{abilities|Twilight Blast|Blasts an enemy for 166250 to 183750 Shadow damage.|id=92949|image=spell fire twilightpyroblast|}} |
||
| − | |- |
||
| + | *{{abilities|Twilight Essence|Deals 9250 to 10750 Shadow damage to enemies within the bubbling Essence.|id=92950|image=spell frost stun|}} |
||
| − | ! Rank !! Level !! Cost |
||
| + | *{{abilities|Unleash Essence|Releases a torrent of twilight energy that afflicts all nearby enemies, dealing damage equal to 10% of their maximum health every 1 sec.|id=92947|image=spell fire twilightnova|}} |
||
| − | |- |
||
| + | *{{abilities|Twilight Slicer|Fires beam of concentrated twilight energy, dealing 50,000 Shadow damage per 0.3 seconds to any enemies that make contact with it.|id=92954|image=spell shadow shadowmend|}} |
||
| − | || 1 || 50<sup>[1]</sup> || Talent |
||
| + | *{{abilities|Wrack|Deals increasing Shadow damage over one minute. When dispelled, bounces to two nearby allies of the afflicted player.|id=92955|image=ability creature cursed 03|}} |
||
| ⚫ | |||
| + | *{{abilities|Twilight Pulse|Deals 27000 to 33000 Shadow damage every 0.5 seconds to enemies within 10 yards.|id=92958|image=spell shadow summonvoidwalker|}} |
||
| − | #Minimum level to acquire the talent |
||
| + | *{{abilities|Twilight Spit|Spits Twilight energy at an enemy, dealing 3800 to 4200 Shadow damage and increasing Shadow damage taken by 10%.|id=92953|image=spell fire twilightflamebreath|}} |
||
| + | *{{abilities|Indomitable|Regains control through a surge of sheer will, becoming immune to all bonds and restraints until stopped. Deals 40000 Shadow damage to enemies within 10 yards and knocks them back.|id=92946|image=spell shaman improvedreincarnation|}} |
||
| − | == |
+ | ==Strategy== |
| + | ===Phase 1=== |
||
| − | Abilities that specifically dispel [[snare]]s will remove the entire debuff, including the negative haste effect. This includes [[Blessing of Freedom]], [[Escape Artist]] and {{loot|common|Living Action Potion}}. |
||
| + | The entire fight is a severe dps check, but phase 1 may be the most important. The boss has a somewhat significant aggro radius and you’ll want to have your whole raid within about 10 or 15 yards of the boss. Have your tank give a 5 second countdown while the raid times their most powerful spells and abilities to hit the boss simultaneously. You’ll need to do all you can to maximize your raid’s dps in this phase. Use raid wide movement increase buffs like Stampeding Roar to help DPSers move in close to the boss faster after the pull. The raid should maintain an even spread in front of the boss without being too stacked up. Do not stand too close to the boss, but try to stay within 10 or 15 yards. You’ll want to assign your healing as follows: |
||
| − | Slow is dispelled as a [[magic (Dispel Type)|magic]] type debuff. |
||
| + | 1 healer for the main tank as well as a beacon if available. |
||
| − | This spell will overwrite the [[debuff]] given from [[Cone of Cold]]. |
||
| + | 1 healer for the offtank as well as a second beacon if available. |
||
| − | ==Talent improvement== |
||
| − | [[File:Slow TCG.jpg|thumb|In the [[World of Warcraft: Trading Card Game]].]] |
||
| − | The talent [[Arcane Focus]] will reduce the chance Slow is resisted by up to 10% at max rank. The talent [[Arcane Subtlety]] will reduce the threat caused by up to 40% at max rank. |
||
| + | 3 healers with Wrack > Raid > Tanks priority. This means that these healers make sure to top of players with the Wrack debuff first, then other non-tanks, then tanks. |
||
| − | ==Tips and tricks== |
||
| − | This is useful against most classes in PvP. For casters, the cast speed debuff is used similar to a warlock's [[Curse of Tongues]], giving the mage a better window to interrupt with [[Counterspell]]. For melee classes, the snare is as effective as any frost-based snare, and the cast is instant, meaning it can be cast on the run to better escape. For [[hunters]] that can't be kited, Slow at least reduces their ranged attack speed. |
||
| + | You’ll need to train a primary and secondary dispeller for wrack as well. The primary dispeller should be a dps class like a shadow priest. The secondary or backup dispeller can be a healer. The general rule of thumb for wrack is that it should be dispelled after being on its target for 10 seconds. If wrack is on a player for longer than 10 seconds, the player risks being killed by the damage. If it is dispelled long before 10 seconds, the raid may end up with too many wracks out at one time and being overwhelmed. The easiest and best way to gain an advantage on wrack, is to extend the duration or time of the first application of wrack each time it goes out. This means if Sinestra casts wrack on a warrior, at around 10 seconds that warrior should use shield wall to keep the debuff longer. This will result in a much easier time dispelling the wrack when it has split multiple times. This goes for any class with abilities that will lower the damage for wrack. It is additionally helpful to have holy priests guardian spirit the first wrack victim so that they can hold the debuff for even one more tick. Raid healers should make sure to keep players with Wrack topped off as much as possible. The number one ability players need to keep their eyes open for are the Twilight Orbs. When these spawn, it is important that players don’t immediately panic and scatter away from them. A small purple beam will form between the orb and player it is fixated on. Recognizing which player is fixated is key to reacting properly to these orbs. Players who are not targeted by the orb must not only get away from the orb, but also make sure they are not between the two orbs. There is around a 3 second grace period between when the beam forms and when the Orbs begin to pulse and slicer between them forms. The players who are fixated should run away from the raid and kite the orbs to the back of the room. In order to increase dps these players should kite around each other halfway through their path and begin returning to the raid. When done properly the orbs will despawn before coming back into the raid and the players can start dpsing again quickly. The whelps that spawn in this phase should be picked up by the offtank and held in the raid. It is ok to dps these, but do not kill them yet. Healers should stand closer to the offtank so that the whelps are easier to pick up and keep off of the healers. The goal of phase 1 is to bring Sinestra to 30% health and start phase 2 before a third set of whelps and before a second Wrack debuff go out. This may require a bit of practice to achieve, but will soon become easily repeatable. |
||
| − | This ability counts as a snare for the purpose of [[Torment the Weak]], but since every tanking class also has a snare, it is seldom necessary in PvE. |
||
| + | ===Phase 2=== |
||
| ⚫ | |||
| − | * {{Patch 3.0.9|note=Now increases cast time by 30%, down from 60%.}} |
||
| + | Phase 2 is an add phase. Start it off by having the raid move to the back of the room. This is where Calen will spawn his Fiery Barrier and the raid must be underneath it to survive Twilight Extinction. The offtank should bring the whelps to the very back of the shield. Once under the bubble, ranged dps should begin to attack Sinestra. She will be invulnerable to damage, but attacking her is necessary to bring down the Twilight Carapace buff on the Pulsing Twilight Eggs. While ranged are doing this, Melee should be AoEing down the Twilight Whelps in one pile. Each time a Twilight Whelp dies, it will turn into a pool of Twilight Essence. If a whelp dies in another whelp’s Twilight Essence, both will respawn. Because of this, all of the whelps that you aoe here will respawn later, but that will not be an issue. The raid will need to split up during this phase and it’s important for each player to know where they need to be. Once twilight extinction has gone out and the whelps are mostly AoE’d down, the tank should move to the middle of the room and prepare to pick up Twilight Drakes. Melee will stay in the back of the room and prepare to dps and stun Twilight Spitecallers. Ranged will split into two groups and move to the walkways to DPS the Pulsing Twilight Eggs. Make sure the split is even so that ranged can hopefully kill each egg in one add wave. Place a healer with each ranged group in case Unleash Essence is cast on the raid. The rest of the healers should be in the back of the room healing melee, the tank, and Calen. If Calen is being healed and Sinestra is being dpsed, the eggs will lose their Twilight Carapace buff for 30 seconds. With very good dps, the ranged groups can kill both eggs in this time. If successful, phase 3 will begin and the raid can move into positions. If unsuccessful in killing both eggs, ranged should begin dpsing Sinestra again while the raid contends with more adds and waits for the Twilight Carapace buff to fall again. During this phase the Twilight Drakes can simply be tanked, but the Spitecallers in the back have an extremely harmful ability called Unleash Essence that must not be allowed to cast. Melee will need to set up a stun rotation to keep these mobs from using this ability. In addition, spitecallers can spawn quite fast making it difficult to keep up with killing them if dps is low. Once both Twilight Eggs have been killed, there will be a 30 second grace period to finish killing any adds left alive before phase 3 starts. Use this time to quickly kill off the remaining Spitecallers and Twilight Drakes. Remember that the whelps will respawn and must be picked up by the offtank again. |
||
| − | {{classfooter|Mage}} |
||
| + | |||
| + | ===Phase 3=== |
||
| + | |||
| + | Phase 3 is Identical to phase 1, but much longer. The raid will begin this phase by being granted with the Essence of the Red buff. This will increase all haste by 100% and give casters infinite mana. The buff is necessary to heal through the damage in this phase and to meet the soft enrage timer. At the start of phase 3, have the raid move back into their phase 1 positions. Wrack, Orbs, and Flame Breath should all be handled just as they were in phase 1. The whelps however, will be treated differently. The offtank will pick these up and tank them in the back of the room. In order to keep the whelps from being killed on top of each other and resurrecting in this phase, they will be pulled off the tank by pre-assigned dpsers and killed off solo in their own areas. Ideally, the whelps should be killed in as compact an area as possible. This is because the void zones that the whelps create upon death will grow indefinitely throughout the fight. Eventually, this can severely limit the safe size of the room and make it quite difficult to move with Twilight Orbs. After three minutes, the Essence of the Red buff will fade and your raid will want to have the boss as low as possible when this happens. The last few percent of the fight without the buff will be extremely brutal. Make sure to use raid cooldowns such as Aura Mastery or Barrier for Flame Breath as healing after it will be difficult. Set up a Tranquility and Hymn rotation to top the raid off after each Flame Breath. It is a good idea to offtank the last two set of whelps in order to maximize dps on the boss. Unless the offtank is a pally, and can bubble off debuffs, they will likely have very high Twilight Spit stacks. Between the third and fourth wave of whelps, the Offtank should taunt Sinestra off of the maintank and allow the maintank to pick up the the rest of the Twilight Whelps. Simply hold these in melee range while the raid focuses on burning down the boss. |
||
| + | |||
| + | This fight will not be easy. The damage is high, the coordination is rigid, and the mechanics are very unforgiving. It’s no wonder Sinestra was tough enough to survive Deathwing. It may take your raid quite some time to down this boss, but don’t let frustration get the better of you. It is overall a fun fight that will really test your skills. Thanks for checking us out here at L2R. We hope this guide was helpful and we’ll see you at the next boss. |
||
| + | |||
| + | |||
| + | Source - http://www.learntoraid.com |
||
| + | |||
| + | ==Quotes== |
||
| + | ;Aggro |
||
| + | *{{text|yell|Sintharia|We were fools to entrust an imbecile like Cho'gall with such a sacred duty. I will deal with you intruders myself!}} |
||
| + | |||
| + | ;Summoning Adds |
||
| + | *{{text|yell|Sintharia|Feed, children! Take your fill from their meaty husks!}} |
||
| + | |||
| + | ;Phase 2 |
||
| + | *{{text|yell|Sintharia|I tire of this! Do you see this clutch amidst which you stand? I have nurtured the spark within them, but that lifeforce is, and always will be, MINE! Behold... power beyond your comprehension!}} |
||
| + | *{{text|yell|Calen|Heroes! You are not alone in this dark place!}} |
||
| + | |||
| + | ;As Calen battles Sintharia |
||
| + | *{{text|yell|Calen|Sintharia! Your master owes me a great debt... one that I intend to extract from his consort's hide!}} |
||
| + | *{{text|yell|Calen|You are weakening, Sintharia! Accept the inevitable.}} |
||
| + | *{{text|yell|Sintharia|You mistake this for weakness? FOOL!}} |
||
| + | |||
| + | ;Phase 3 |
||
| + | *{{text|yell|Sintharia|Enough! Drawing upon this source will set us back months... you should feel honored to be worthy of this expenditure! NOW DIE!}} |
||
| + | |||
| + | ;Calen dies |
||
| + | *{{text|yell|Calen|The fires dim, champions... Take this, the last of my power. Succeed where I have failed... Avenge me. Avenge the world...}} |
||
| + | |||
| + | ;Killing a player |
||
| + | *{{text|yell|Sintharia|My brood will feed on your bones!}} |
||
| + | *{{text|yell|Sintharia|Powerless...}} |
||
| + | |||
| + | ;Death |
||
| + | *{{text|yell|Sintharia|Deathwing... I have fallen... the brood... is lost...}} |
||
| + | |||
| + | ==Loot== |
||
| + | {{lootbox|Heroic |
||
| + | |Belt of the Fallen Brood |
||
| + | |Bindings of Bleak Betrayal |
||
| + | |Boots of Az'galada |
||
| + | |Bracers of the Dark Mother |
||
| + | |Bracers of the Mat'redor |
||
| + | |Caelestrasz's Will |
||
| + | |Crown of the Twilight Queen |
||
| + | |Dargonax's Signet |
||
| + | |Nightmare Rider's Boots |
||
| + | |Shard of Woe |
||
| + | |Shroud of Endless Grief |
||
| + | |Twilight Scale Leggings |
||
| + | |War-Torn Crushers |
||
| ⚫ | |||
| + | |||
| + | ==Related Achievements== |
||
| + | *{{achievement|Heroic: Sinestra}} |
||
| + | *{{achievement|I Can't Hear You Over the Sound of How Awesome I Am}} |
||
| + | *{{achievement|Realm First! Sinestra}} |
||
| + | |||
| + | ==Trivia== |
||
| + | She uses the same animation set as [[Kil'jaeden]]. |
||
| + | |||
| + | ==Videos== |
||
| + | |||
| + | ===10-man Heroic=== |
||
| + | {{Youtubelink|gFSCT8QRjdU|desc=[http://www.vagrantcorps.com/ Vagrant Corps] - 1080p}} |
||
| + | |||
| + | ===25-man Heroic=== |
||
| + | {{Youtubelink|LPAF8d4BThI|desc=Learntoraid}} |
||
| + | {{Youtubelink|ncOTyhI-H7o|desc=Blood Legion}} |
||
| + | {{Youtubelink|ZCjUYMSNq5Y|desc=Vodka}} |
||
| + | {{Youtubelink|k41MEXva_gM|desc=EG}} |
||
| + | |||
| ⚫ | |||
| + | *{{Patch 4.1.0|note= |
||
| + | ** Twilight Slicer is now less likely to target two healers at once. |
||
| + | ** Wrack will avoid jumping to tanks.}} |
||
| + | *{{Patched|date=2011-01-18|bluenote=Many adjustments to the behavior of various mechanics in the Sinesetra encounter have been made.}} |
||
| + | *{{Patch 4.0.3a|note=Added.}} |
||
| + | == External links == |
||
| − | {{DEFAULTSORT:Slow (Mage)}} |
||
| + | <!-- Read http://www.wowpedia.org/Wowpedia:External_links before posting your links here. |
||
| ⚫ | |||
| + | Links that do not conform to the rules will be DELETED. |
||
| ⚫ | |||
| + | Repeat violations may result in a BAN. |
||
| − | [[Category:Mage talents]] |
||
| + | Have a nice day. :) --> |
||
| − | [[Category:Magic debuffs]] |
||
| + | {{Elinks-NPC|45213}} |
||
| + | {{elink|icon=L2R|site=Learntoraid.com|link=http://www.learntoraid.com/2011/02/22/lady-sinestra-video-strategy-guide-heroic|desc=Lady Sinestra Strategy Guide}} |
||
| ⚫ | |||
| ⚫ | |||
| + | [[Category:The Bastion of Twilight mobs]] |
||
Revision as of 01:54, 20 June 2011
- For her character biography, see Sintharia.
 | |||||||
| Title | <Consort of Deathwing> | ||||||
| Gender | Female | ||||||
| Race | Black wyrm (Dragonkin) | ||||||
| Level | ?? Boss | ||||||
| Reaction | Alliance Horde | ||||||
| Location | Twilight Caverns, Bastion of Twilight | ||||||
| |||||||
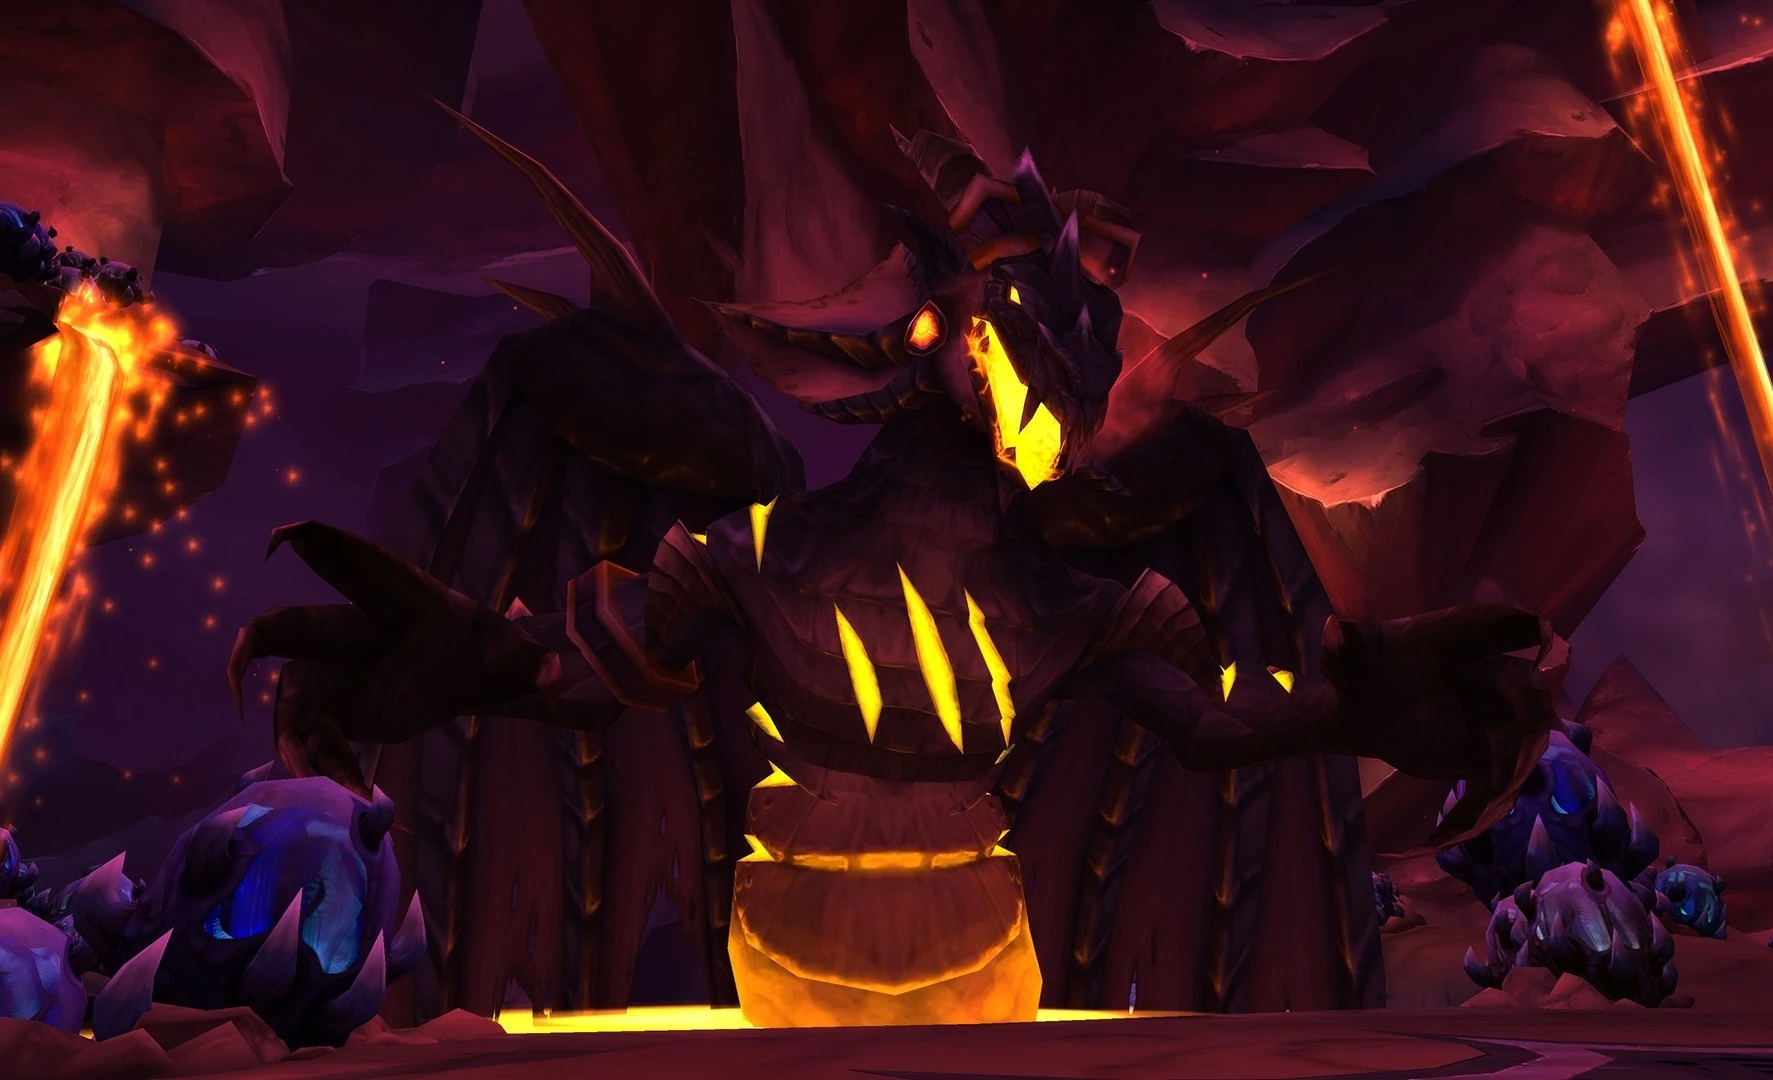
Sinestra is a heroic-mode only boss in the Bastion of Twilight, described as similar to Algalon the Observer in Ulduar. She is only accessible after Cho'gall is defeated.
The world first kill was made by Paragon of Lightning's Blade-EU on January 20, 2011.
Originally Deathwing's Prime Consort, Sinestra created the first twilight dragons, but was later obliterated by one of her terrifying creations. Now a ravaged husk reanimated by insidious magic, Sinestra oversees the creation of new twilight clutches. [1]
Attacks and abilities
 Twilight Blast — Blasts an enemy for 166250 to 183750 Shadow damage.
- Twilight Essence — Deals 9250 to 10750 Shadow damage to enemies within the bubbling Essence.
- Unleash Essence — Releases a torrent of twilight energy that afflicts all nearby enemies, dealing damage equal to 10% of their maximum health every 1 sec.
- Twilight Slicer — Fires beam of concentrated twilight energy, dealing 50,000 Shadow damage per 0.3 seconds to any enemies that make contact with it.
- Wrack — Deals increasing Shadow damage over one minute. When dispelled, bounces to two nearby allies of the afflicted player.
- Twilight Pulse — Deals 27000 to 33000 Shadow damage every 0.5 seconds to enemies within 10 yards.
- Twilight Spit — Spits Twilight energy at an enemy, dealing 3800 to 4200 Shadow damage and increasing Shadow damage taken by 10%.
- Indomitable — Regains control through a surge of sheer will, becoming immune to all bonds and restraints until stopped. Deals 40000 Shadow damage to enemies within 10 yards and knocks them back.
Strategy
Phase 1
The entire fight is a severe dps check, but phase 1 may be the most important. The boss has a somewhat significant aggro radius and you’ll want to have your whole raid within about 10 or 15 yards of the boss. Have your tank give a 5 second countdown while the raid times their most powerful spells and abilities to hit the boss simultaneously. You’ll need to do all you can to maximize your raid’s dps in this phase. Use raid wide movement increase buffs like Stampeding Roar to help DPSers move in close to the boss faster after the pull. The raid should maintain an even spread in front of the boss without being too stacked up. Do not stand too close to the boss, but try to stay within 10 or 15 yards. You’ll want to assign your healing as follows:
1 healer for the main tank as well as a beacon if available.
1 healer for the offtank as well as a second beacon if available.
3 healers with Wrack > Raid > Tanks priority. This means that these healers make sure to top of players with the Wrack debuff first, then other non-tanks, then tanks.
You’ll need to train a primary and secondary dispeller for wrack as well. The primary dispeller should be a dps class like a shadow priest. The secondary or backup dispeller can be a healer. The general rule of thumb for wrack is that it should be dispelled after being on its target for 10 seconds. If wrack is on a player for longer than 10 seconds, the player risks being killed by the damage. If it is dispelled long before 10 seconds, the raid may end up with too many wracks out at one time and being overwhelmed. The easiest and best way to gain an advantage on wrack, is to extend the duration or time of the first application of wrack each time it goes out. This means if Sinestra casts wrack on a warrior, at around 10 seconds that warrior should use shield wall to keep the debuff longer. This will result in a much easier time dispelling the wrack when it has split multiple times. This goes for any class with abilities that will lower the damage for wrack. It is additionally helpful to have holy priests guardian spirit the first wrack victim so that they can hold the debuff for even one more tick. Raid healers should make sure to keep players with Wrack topped off as much as possible. The number one ability players need to keep their eyes open for are the Twilight Orbs. When these spawn, it is important that players don’t immediately panic and scatter away from them. A small purple beam will form between the orb and player it is fixated on. Recognizing which player is fixated is key to reacting properly to these orbs. Players who are not targeted by the orb must not only get away from the orb, but also make sure they are not between the two orbs. There is around a 3 second grace period between when the beam forms and when the Orbs begin to pulse and slicer between them forms. The players who are fixated should run away from the raid and kite the orbs to the back of the room. In order to increase dps these players should kite around each other halfway through their path and begin returning to the raid. When done properly the orbs will despawn before coming back into the raid and the players can start dpsing again quickly. The whelps that spawn in this phase should be picked up by the offtank and held in the raid. It is ok to dps these, but do not kill them yet. Healers should stand closer to the offtank so that the whelps are easier to pick up and keep off of the healers. The goal of phase 1 is to bring Sinestra to 30% health and start phase 2 before a third set of whelps and before a second Wrack debuff go out. This may require a bit of practice to achieve, but will soon become easily repeatable.
Phase 2
Phase 2 is an add phase. Start it off by having the raid move to the back of the room. This is where Calen will spawn his Fiery Barrier and the raid must be underneath it to survive Twilight Extinction. The offtank should bring the whelps to the very back of the shield. Once under the bubble, ranged dps should begin to attack Sinestra. She will be invulnerable to damage, but attacking her is necessary to bring down the Twilight Carapace buff on the Pulsing Twilight Eggs. While ranged are doing this, Melee should be AoEing down the Twilight Whelps in one pile. Each time a Twilight Whelp dies, it will turn into a pool of Twilight Essence. If a whelp dies in another whelp’s Twilight Essence, both will respawn. Because of this, all of the whelps that you aoe here will respawn later, but that will not be an issue. The raid will need to split up during this phase and it’s important for each player to know where they need to be. Once twilight extinction has gone out and the whelps are mostly AoE’d down, the tank should move to the middle of the room and prepare to pick up Twilight Drakes. Melee will stay in the back of the room and prepare to dps and stun Twilight Spitecallers. Ranged will split into two groups and move to the walkways to DPS the Pulsing Twilight Eggs. Make sure the split is even so that ranged can hopefully kill each egg in one add wave. Place a healer with each ranged group in case Unleash Essence is cast on the raid. The rest of the healers should be in the back of the room healing melee, the tank, and Calen. If Calen is being healed and Sinestra is being dpsed, the eggs will lose their Twilight Carapace buff for 30 seconds. With very good dps, the ranged groups can kill both eggs in this time. If successful, phase 3 will begin and the raid can move into positions. If unsuccessful in killing both eggs, ranged should begin dpsing Sinestra again while the raid contends with more adds and waits for the Twilight Carapace buff to fall again. During this phase the Twilight Drakes can simply be tanked, but the Spitecallers in the back have an extremely harmful ability called Unleash Essence that must not be allowed to cast. Melee will need to set up a stun rotation to keep these mobs from using this ability. In addition, spitecallers can spawn quite fast making it difficult to keep up with killing them if dps is low. Once both Twilight Eggs have been killed, there will be a 30 second grace period to finish killing any adds left alive before phase 3 starts. Use this time to quickly kill off the remaining Spitecallers and Twilight Drakes. Remember that the whelps will respawn and must be picked up by the offtank again.
Phase 3
Phase 3 is Identical to phase 1, but much longer. The raid will begin this phase by being granted with the Essence of the Red buff. This will increase all haste by 100% and give casters infinite mana. The buff is necessary to heal through the damage in this phase and to meet the soft enrage timer. At the start of phase 3, have the raid move back into their phase 1 positions. Wrack, Orbs, and Flame Breath should all be handled just as they were in phase 1. The whelps however, will be treated differently. The offtank will pick these up and tank them in the back of the room. In order to keep the whelps from being killed on top of each other and resurrecting in this phase, they will be pulled off the tank by pre-assigned dpsers and killed off solo in their own areas. Ideally, the whelps should be killed in as compact an area as possible. This is because the void zones that the whelps create upon death will grow indefinitely throughout the fight. Eventually, this can severely limit the safe size of the room and make it quite difficult to move with Twilight Orbs. After three minutes, the Essence of the Red buff will fade and your raid will want to have the boss as low as possible when this happens. The last few percent of the fight without the buff will be extremely brutal. Make sure to use raid cooldowns such as Aura Mastery or Barrier for Flame Breath as healing after it will be difficult. Set up a Tranquility and Hymn rotation to top the raid off after each Flame Breath. It is a good idea to offtank the last two set of whelps in order to maximize dps on the boss. Unless the offtank is a pally, and can bubble off debuffs, they will likely have very high Twilight Spit stacks. Between the third and fourth wave of whelps, the Offtank should taunt Sinestra off of the maintank and allow the maintank to pick up the the rest of the Twilight Whelps. Simply hold these in melee range while the raid focuses on burning down the boss.
This fight will not be easy. The damage is high, the coordination is rigid, and the mechanics are very unforgiving. It’s no wonder Sinestra was tough enough to survive Deathwing. It may take your raid quite some time to down this boss, but don’t let frustration get the better of you. It is overall a fun fight that will really test your skills. Thanks for checking us out here at L2R. We hope this guide was helpful and we’ll see you at the next boss.
Source - http://www.learntoraid.com
Quotes
- Aggro
- Sintharia yells: We were fools to entrust an imbecile like Cho'gall with such a sacred duty. I will deal with you intruders myself!
- Summoning Adds
- Sintharia yells: Feed, children! Take your fill from their meaty husks!
- Phase 2
- Sintharia yells: I tire of this! Do you see this clutch amidst which you stand? I have nurtured the spark within them, but that lifeforce is, and always will be, MINE! Behold... power beyond your comprehension!
- Calen yells: Heroes! You are not alone in this dark place!
- As Calen battles Sintharia
- Calen yells: Sintharia! Your master owes me a great debt... one that I intend to extract from his consort's hide!
- Calen yells: You are weakening, Sintharia! Accept the inevitable.
- Sintharia yells: You mistake this for weakness? FOOL!
- Phase 3
- Sintharia yells: Enough! Drawing upon this source will set us back months... you should feel honored to be worthy of this expenditure! NOW DIE!
- Calen dies
- Calen yells: The fires dim, champions... Take this, the last of my power. Succeed where I have failed... Avenge me. Avenge the world...
- Killing a player
- Sintharia yells: My brood will feed on your bones!
- Sintharia yells: Powerless...
- Death
- Sintharia yells: Deathwing... I have fallen... the brood... is lost...
Loot
Related Achievements
Trivia
She uses the same animation set as Kil'jaeden.
Videos
10-man Heroic
Template:Youtubelink
25-man Heroic
Template:Youtubelink Template:Youtubelink Template:Youtubelink Template:Youtubelink
Patch changes
- Patch 4.1.0 (2011-04-26):
- Twilight Slicer is now less likely to target two healers at once.
- Wrack will avoid jumping to tanks.
- Template:Patched
- Patch 4.0.3a (2010-11-23): Added.